Ackee & Saltfish(less)

I have countless vain attempts to go vegan over the past 2 years. The first time round in 2018 I panicked and bought and created every meat and diary substitute in sight for fear of starvation.

After a few (days), I settled down and began to enjoy how colorful my plate was now looking with fresh salads and fruits I would only have as a snack or in the summer months.

But then problems hit when I started eating out again: I was condemned to ordering 3-4 sides because the only vegan option was a burnt off aubergine or waterlogged portbello mushroom (minus juicy halloumi cheese?!) in a bun.

I soon realized that veganism didn’t equate to better health or weight loss, in fact would you believe that eating onion rings, chips and vegetable spring rolls do no good to my arteries.

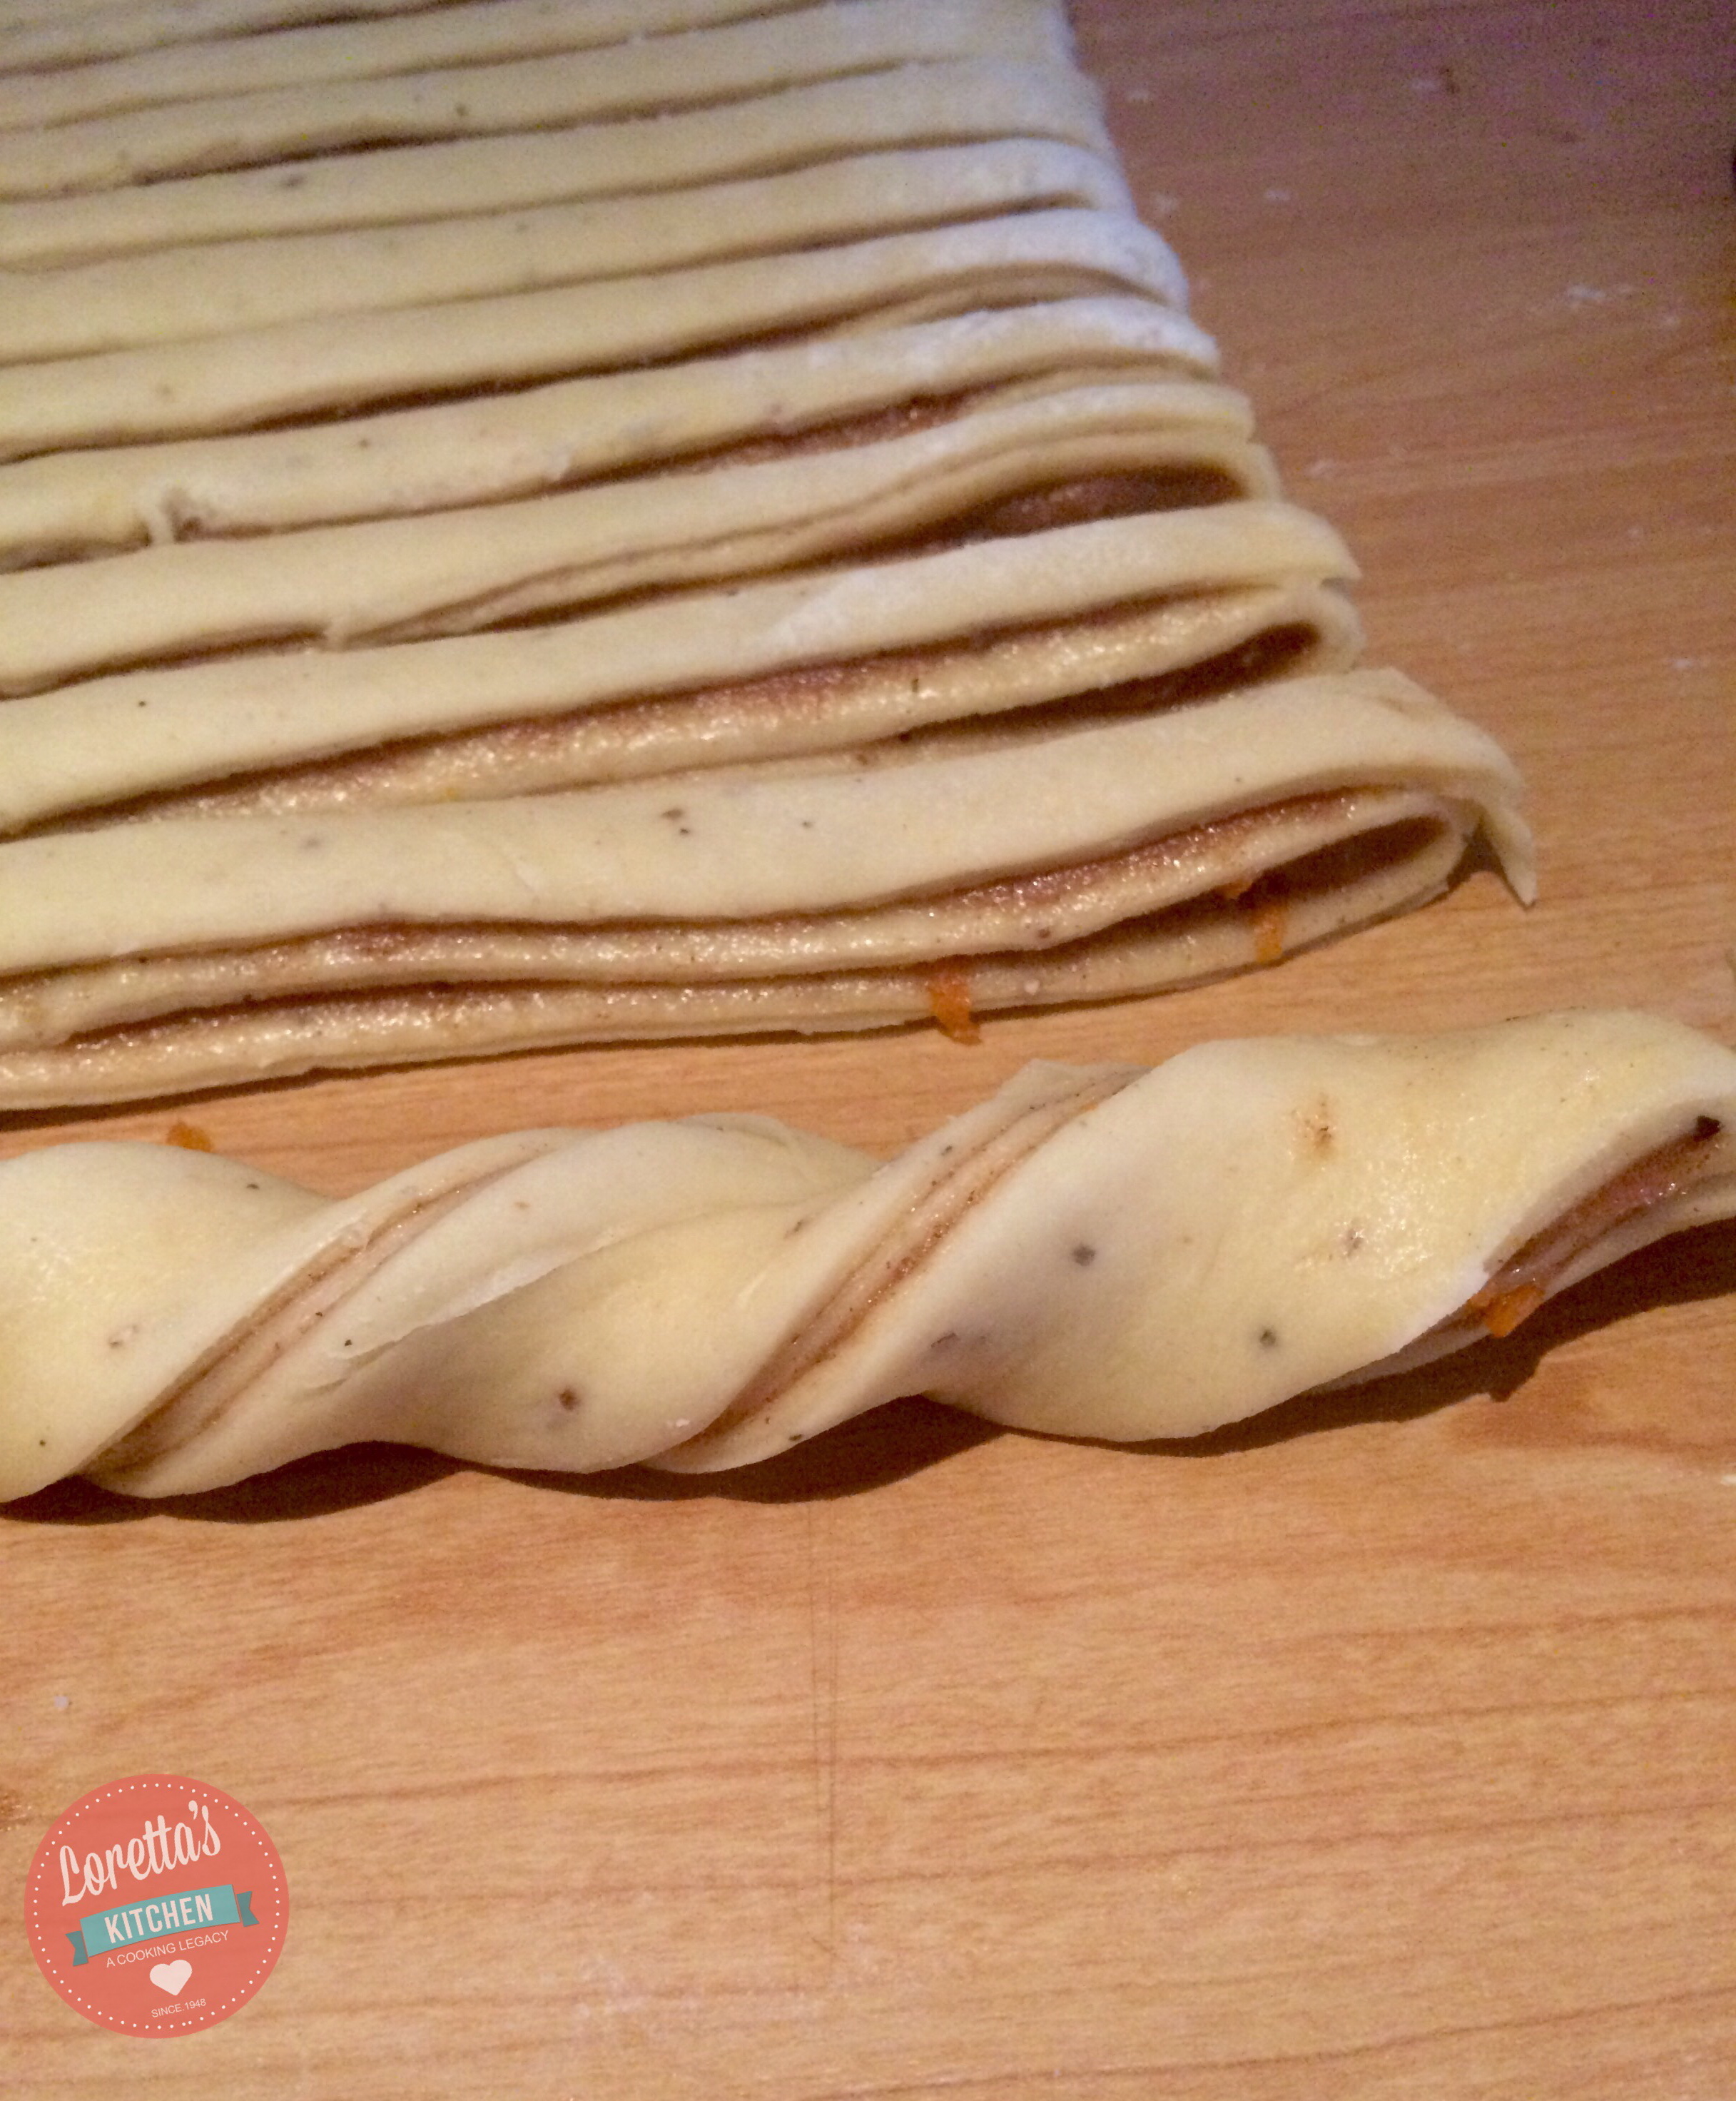
So on reflection I realized that all I had to do to maintain this vegan lifestyle was make a few subtle changes to dishes I already know and love…and keep doing it. This is where I met the beloved artichoke.

I started thinking about what I liked about meat: it wasn’t just the taste, it was the texture: the chewy resistance from red meat, the salty flakiness from fish, the rich depth of flavor made with chicken stock. And then I thought about their vegetable equivalent. That’s how I discovered artichokes, the closet relative to salt-fish I could find. The artichoke petals were flaky enough to absorb flavor and create texture; when char-grilled and stored in brine or oil, the bitterness created the illusion of a fillet. Yes I know one of the biggest accusation made against vegan’s is why do you need to imitate the same food you’re avoiding?! Why the imitation cheeze and ‘tofish’ - I get it. And I have not intellectual response to that other than that’s just how we’ve been socialized you don’t want to feel like you’re missing out on the fun, delicious mainstream cuisines- especially like me still haven’t made the transition to veganism as yet.

Ok so enough chatter - below is the recipe for Ackee & Saltfish(less), let me know what you think: does artichoke do it for you? What would you use instead?

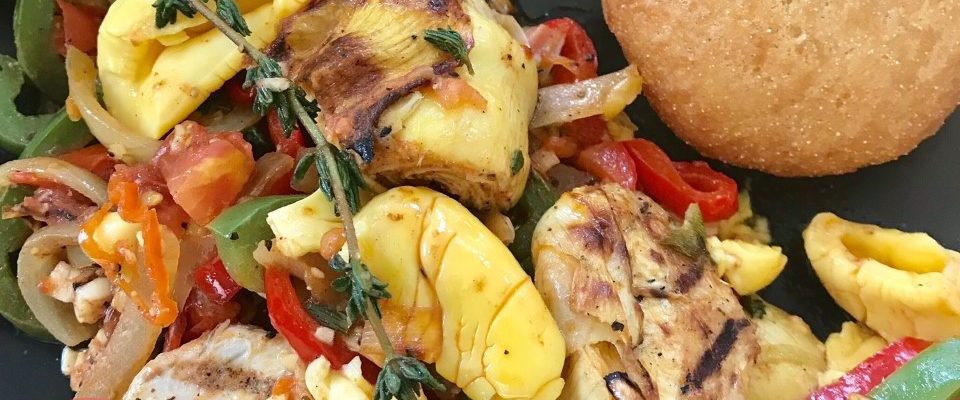
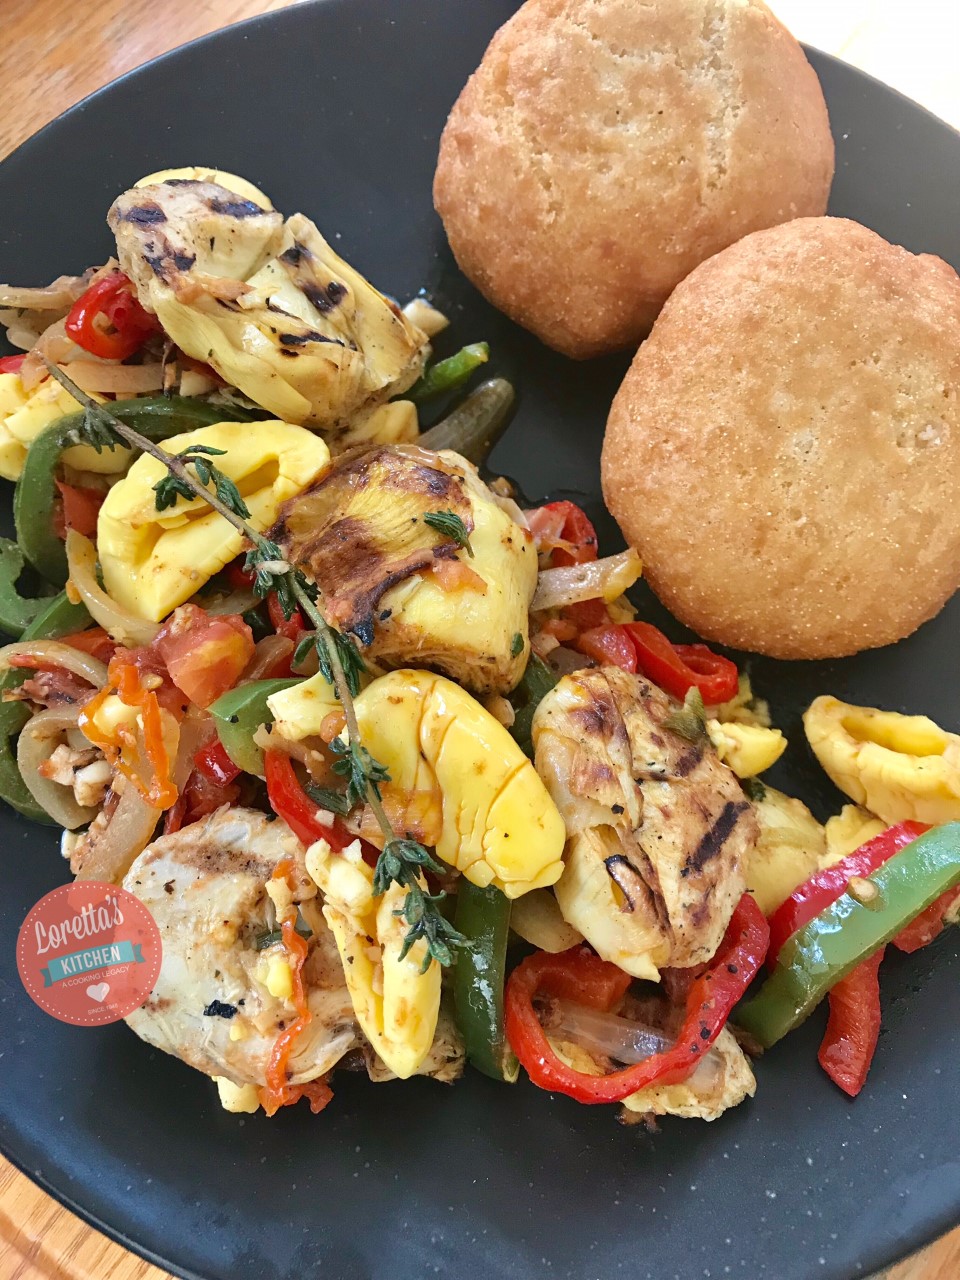
Ackee and Saltfish(less)

  • Servings: 3
  • Difficulty: easy
  • Print

Ingredients:

Red and Green Sweet Peppers - finely sliced

1/2 scotch bonnet pepper - de-seeded, finely sliced or chopped

2 Banana Shallots - finely sliced

thumb nail - ginger - crushed

4 cloves garlic - chopped

Sprigs Fresh Thyme

2 tbsp Bajan Pepper Sauce

Salt and Pepper to Taste

1 tin Fresh Ackee

1 jar - Chargrilled Artichoke

1 fresh Tomato - finely chopped

Method:

  1. Saute the onions, garlic, ginger and scotch bonnet in a large pan until soft
  2. Add the sweet peppers with fresh thyme and fry gently (you don’t want to lose the colour on the peppers)
  3. Add the tomato and allow the tomato water to absorb in the pan
  4. Drain the artichokes and cut into smaller pieces if needed. Then add to the pan to warm through for 2-3 minutes. Keep on a low heat
  5. Drain the Ackee and transfer to a separate pan with a lid (ensure with a little of the water from the tin) and let it steam in the pan for 3 minutes.
  6. When the ackee is warmed through, transfer it to the main pan and add the pepper sauce and season to taste

Serve with bread of fried bakes (as pictured)

Advertisement

Swedish Cardamom Buns


If your first thoughts were: “this looks complicated”, then think again. Because once you read through the step by step guide below, you will be tying knots (albeit the dough kind) like a sailor. They are so much fun to make!

This recipe reminds me of the brioche loaves I made last year because of the light buttery texture of the bread. These buns take less than half the time it takes to make brioche and has a lot more flavour: I brought them into the office the next day and before I got back to my seat they were all gone!

Not all recipes use egg but I find adding it here helps give the dough a soft, cakey like texture that you expect from a cinnamon roll. I love the generous use of cardamom, one of my favourite spices. It was back breaking having to grind it by hand in a mortar and pestle; very few places sell the seeds grounded. Be generous with the spice measurements, about 1/4 of it will melt away in the baking process anyway.

And yes I have to admit I played around with the recipe - I added orange rind, nutmeg and almond essence to the mix. This is all optional.

Bon appetit!


Swedish Cardamom Buns

INGREDIENTS

CARDAMOM DOUGH

  • 1 cup + 1 Tbsp. (250 ml) milk, lukewarm temprature
  • 1 envelope dry active yeast (7 g)
  • 1 1/2 tsp almond essence
  • 1/3 cup (67 g) light brown sugar
  • 3 1/4 cup (406 g) all-purpose flour, plus more to flour surfaces
  • 1 tsp. ground cardamom seeds
  • 1/4 tsp. salt
  • 5 Tbsp. (75 g) butter (at room temperature)
  • Oil/cooking spray (to grease bowl)


CARDAMOM FILLING

  • 4-5 Tbsp. (about 63 g) unsalted butter (at room temperature)
  • 1/3 cup (65 g) dark brown sugar
  • 2 tbsp. ground cardamom seeds
  • 3 tbsp cinnamon powder
  • 1 tsp nutmeg
  • 3 tbsp freshly grated orange rind
  • 1 tsp almond essence


CARDAMOM GLAZE

  • 1 egg - whisked


CARDAMOM DOUGH

  1. Pre-grease/oil a large bowl and set aside.
  2. In a small bowl, add yeast to the lukewarm milk with 1 tsp. light brown sugar and stir until yeast has dissolved. Let activate for 10 minutes.
  3. Meanwhile, grind/crush cardamom seeds with spice grinder or mortar and pestle. In the bowl of your stand mixer, fitted with whisk attachment, mix together flour, light brown sugar (less 1 tsp.), cardamom, and salt.
  4. Change the attachment to the dough hook attachment.
  5. After yeast has been activated, add almond essence to your yeast/milk mixture, then add to the flour mixture and mix on low until dough begins to come together. Increase speed to medium-low and add cubed butter in handfuls. Once all the butter has been added, increase speed to medium/medium-high and knead for about 5 minutes. You want this to be a fairly loose dough, so whatever you do, don’t over knead.
  6. Scrape dough out onto a lightly floured surface and shape it into a bun, tucking the edges toward the centre.  Place in your greased bowl, seam side down and cover with a clean kitchen towel. Place bowl in a warm place and let it rise for at least 40 minutes.


CARDAMOM FILLING

  1. In the bowl combine butter, dark brown sugar, and freshly ground/crushed cardamom seeds and the remaining spices until creamy and smooth.


FORMING

  1. Line baking sheets with baking paper.
  2. Roll out dough into a 13” x 21” rectangle on a lightly floured surface.
  3. Spread filling onto the rolled out dough rectangle with a spatula so that it covers the entire area from edge to edge.

IMG_3828

  1. Mark 7″ sections on the 21″ side with the back of a knife so that you have three equal sections. Fold left side to the middle, than fold the right side over the left side. Turn the dough so that the openings are on the left and right sides and roll out the dough slightly.

IMG_3829

  1. Using your ruler and sharp knife or pastry wheel, cut 2 cm strands. You should have 15-20 strands.

IMG_3825

  1. Starting from the end, wrap one strand around the tips of your thumb and four fingers (three if you have big hands) twice, twisting slightly as you wrap, then slip your thumb out of the roll, loop the strand around one last time then tuck the end and your thumb loop into the bottom. If you’re having trouble, please re-watch this link. Repeat with all strands.
  2. Place buns on your pre-lined baking sheets, (giving enough room for dough to rise and spread during proofing and baking), cover with a kitchen towel and let rise for about 30 minutes.

IMG_3823_2

  1. While proofing, preheat oven to 435°F (at least 30 minutes before baking)


BAKE

  1. Brush the surface of each bun with the whisked egg
  2. Bake proofed rolls for 7-8 minutes or until tops are golden brown
  1. When they have cooled down completely, you add a dollop of orange infused cream cheese, (a mixure of orange peel, juice, icing sugar and cream cheese) to each bun.
  2. Serve and enjoy!!


Ethiopian Lentil Stew (Misir Wot)

If you can’t stand the heat, then you better stay out the Ethiopian Kitchen!

It’s not that Ethiopian food doesn’t have a range of mild flavoured dishes, they do, but pepper is so essential to the cuisine that to avoid it is to essentially ban yourself from the whole experience!

Ethiopian Cuisine: I haven’t tasted anything so lip-smackingly delicious in a good long time! I’m gonna be stuck on this for a while!

Ok admittedly the last time I tasted authentic Ethiopian cuisine was about a year ago where I just happened to walk by a small take away 5 minutes walk down Kingsland High Street in Dalston, London. They offer a selection of stews or ‘wots’ with a combination or rice or the infamous Injera bread, all for just £4!!

FullSizeRender (13)
Kingland High Street, Dalston, London

Many Ethiopian’s are Orthodox Christians who traditionally eat vegan on Wednesdays and Fridays, as well as other special days,  hence why there is such a wide selection of vegan/vegetarian Ethiopian dishes.

This recipe is adapted from the more classic Misir Wot, which literally means ‘lentil stew’; I have added sweet potato, coconut milk and spinach to this mix.

This is also my first time using my new found Ethiopian spice blend home made brebere which I made virtually a few minutes before assembling this dish. I didn’t taste the stew till the very end, and when I did, let me tell you I almost burnt my mouth going for a second helping, I was surprised! With such a wide range of spices all packed in one blend, I was expecting a bitter, confused taste, instead - pure harmony, I could taste everything, not overpowering at all. So step away scotch bonnet! There’s a new kid in town!

More Ethiopian dishes to come!


Ethiopian Lentil Stew (Misir Wot) 


INGREDIENTS

2 medium sized sweet potatoes - cut into chunks

1/2 white onion, sliced

2 large garlic cloves - crushed

1 tsp finger chopped fresh ginger

1 tbsp coconut oil - frying

1 1/4 cup green lentils - pre-cooked

1 tbsp Tomato Paste or 2 plum tomatoes (crushed) with a little juice

2 1/2 tsp of Homemade Berbere Spice

1 cup Coconut Milk

2 cups of boiling water

1 chicken or vegetable stock jelly

3-4 Pimento Seeds

1 generous handful of spinach


METHOD

  1. In a bowl dissolve the stock jelly in the 2 cups of hot water with the pimento seeds. Set aside.
  2. Soften the onions slowly in a deep pot with the coconut oil for 5-6 minutes
  3. Add the garlic and ginger - 2 minutes
  4. Stir in the berbere spice, take it off the fire to allow it to slowly cook
  5. Return the pot to the fire and add the tomatoes, allow it to reduce for 2 minutes, until the water has evaporated.
  6. Add the sweet potato and stir
  7. Add the lentils, stir (medium heat)
  8. Add the stock liquid, pimento seeds and coconut milk. Cover and allow to simmer for 10-5 minutes or until the sweet potato is tender
  9. Stir the spinach in at the end. Season to taste.
  10. Serve with rice


Golden Patties: Can I take your order?

Is it too early to start talking about Christmas?

It’s 6 weeks away…you can thank me later 😉 This might not come as a shock to many of you, but to those planning on having a whole load of hungry guests share their personal space for at least 24 hours, it might be a good idea to start thinking about it from now.


You might be wondering what Christmas has to do with the mouth-watering beef patties pictured above, well I won’t waste anymore of your time; I have been practising my hardest at making jamaican patties, (see my instagram page). Now I think I have mastered the taste and texture, for the first time ever…just in time for Christmas 😉

Could you see these golden patties on your buffet table or office party? Maybe you want a Christmas brunch without any hassle; I think these mini patties which fit neatly in the palm of your hand would do the trick.FullSizeRender (9)

I’m working on some different flavours: pulled bbq chicken, feta and sun-dried tomato…what other combinations are there? I’d be interested to know what you’ve filled your pies and patties with recently.

Drop your comments below…;-)

Cherry Coconut Lime Ice Cream

Love Your Freezer!

I know it’s that time of year again where I am still surprised it can get this cold in the UK; we’re experiencing the four seasons of snow, wind, sunshine and rain all in one day. Having said that, it’s also a perfect time to raid the kitchen cupboards or in this case the freezer to see what gems of a recipe I can create with ingredients you have thrown to the oblivion of the freezer bed.

Here is a recipe that I made a few months back- the beauty of it is that it requires no complicated equipment like a ice cream maker which to be honest you only bring out once a year to impress your neighbours. Nope, just your freezer box, some frozen cherries (or any frozen fruit you have) and 4 other ingredients.

This creamy ice-cream is really very satisfying, with so little effort. I think you’ll love it!

photo 1

A few weeks ago I was catching up with a couple of friends, when quite naturally the conversation turned to food and some of the interesting food combinations we have had on our travels and experiments with chocolate in our baking. In that moment, Catherine interrupted my train of thought as she more or less re-enacted the first time she tried Cherry and Coconut Ice Cream in Barbados.

“It has to have the little bits of coconut in it” she explained, leaving the rest of us salivating at the thought. I immediately began to picture the combination, but the thought of grating a whole coconut on a lazy Sunday morning, just wasn’t my idea of fun. The conversation moved on, but the challenge never left me.

I knew I wanted to make an egg-less ice cream, one that also didn’t require an ice cream machine nor took all day to set. It…

View original post 101 more words

Roasted Pumpkin & Garlic Soup

unnamed

So this is how you make effortless, tasty and satisfying soup in minutes. Soup doesn’t have to be complicated nor does it need a whole bunch of ingredients to leave your mouth watering for more. I grew up using yellow or red split peas as a base for thick soups. But as the split peas release no flavour of their own, I found myself adding tons of ingredients, and root vegetables which meant more time in the kitchen and less time doing the other things I enjoyed doing.

This soup however is complete in 3 easy steps: roast, blend, boil.

And if you have any left over, it could work as a good based for a pasta dish or stew. The dense sweet nutty flavour of this variety of pumpkin (normally sold in caribbean markets) when roasted needs very little to enhance its flavour more. You can add more or less water to achieve the consistency you want. I think you’re going to really like this one…;-)

Roasted Pumpkin and Garlic Soup

Ingredients:

600g Raw Pumpkin (leave skin on)

Half White Onion

Half Garlic Head (sliced down centre)

Drizzle of Olive Oil

4-5 Sprigs Fresh Thyme

1 Scotch Bonnet

1/2 vegetable stock cube

1 tsp garlic/ ginger paste

Salt/ pepper to taste

1 1/2 cups water

Method:

Pre-heat oven to Gas Mark 8

Place Pumpkin, onion and garlic into a roasting tin and drizzle with oil, salt and pepper. Remove any excess skin from the onion and garlic to reduce burning.

Place in oven for 23-30 minutes or until the pumpkin is tender

Remove the tin from the oven and allow to cool for 15 minutes before scooping the pumpkin flesh, squeezing the garlic bulbs out of its shell and removing the outer skin from the now caramelised onion.

Transfer to a large pot with the remaining ingredients on the list. Boil for 5-6 minutes gently breaking up the vegetables.

Then allow it to cool for 10 minutes before transferring all the ingredients (except the thyme and pepper) into a blender until smooth. Return the soup to the pot and continue boiling for 5 minutes, season to taste and serve!

Quick Golden Multi-seed Bread

There is nothing more appealing than the smell and look of fresh bread from straight out the oven. It sends you drooling, scrambling for the bread knife or the first opportunity to rip a piece out of its side to smother it with cool butter, jam or chocolate spread. In this case chocolate spread won: it was a delicious combination of Nutella with the crunchy seeds and malty taste of the fluffy bread that made my midday brunch most satisfying.

And to think that only a couple of hours earlier this loaf of bread was merely a packet of bread mix, olive oil and a bit of water away from becoming delicious! This is probably the most surprisingly tasty bread mixes I have made: the dough turned into deep caramel the moment I started to add water to the mix. I was also tempted at some stage to add honey to the mix, in fear the bread would be bland, but it wasn’t necessary. The bread was fluffy and had a slight sweetness to it.

The following day the bread was a little firmer, probably because I put it in the fridge wrapped in cling film. This actually made it good for toasting. Every once in a while it’s nice to treat yourself to some home made bread, the downside is you feel obliged to eat it all yourself so I would recommend making rolls so that you can share it among your friends and family.

Golden Multi-Seed Bread

Ingredients:

1 packet of Sainsbury’s Golden Multi-seed Bread Mix

15 ml Olive Oil or 25g butter

320 ml luke warm water

Method:

(to bake by hand0

1. Rub the bread mix with the butter or oil in a bowl with your fingertips until the mixture resembles fine breadcrumbs. Gradually add the water to form a soft dough.

2. Knead well on a floured surface for 10 minutes until smooth and elastic, then place it back in the bowl, cover with lightly oiled cling film. Leave the dough in a warm place for one hour to rise and double in size.

3. Knead well again on a floured surface for a few minutes, place in a greased 2lb loaf tin. Or shape the dough into 8 equal sized balls and placed in a round tin (as pictured above).

Cover with lightly oiled cling film. Leave the dough in a warm place for half an hour to rise again and increase in size. Preheated oven 230oC/450oF/Gas mark 8

4. Remove cling film and bake in the top of the ovenfor 30 minutes or until golden brown. Then brush with melted butter to give the warm bread a glossy shine and buttery taste.

Raspberry Cheesecake Brownie


Someone once said that the best things in life come in threes like friends, dreams and memories. I would like to stick this cake at the end of that quote, because the three layers that make up this sweet sandwich will be a close memory I hope to never wake up from.

This cake has something for everyone: when I brought this cake into work Monday morning, the winning layer appeared to be the soufflé type raspberry cream topping. Others favoured the dense texture of the brownie and a small minority enjoyed the fluffy and  slight saltiness of the layer of cheesecake.

My eyes are immediately drawn to the creamy top if I’m honest; I’m not one for things being symmetrical and in order, but I have to say I love how the contrasting textures hold together forming this perfectly layered square.  I was a little nervous baking the brownie and the cheesecake together,  fearing one would bleed into the other forming some kind of marble effect. But as long as you keep the cake in the fridge, the cream will keep on top of the cake and keep its shape for a good 6 hours.


Rasberry Cheesecake Brownie

  • Servings: 12
  • Difficulty: easy
  • Print


Ingredients:

For the Brownie 

200g Sainsbury’s Belgian dark chocolate chips

200g unsalted butter (softened)

250g icing sugar

3 eggs

110g plain flour


For the Cheesecake

400g cream cheese

150g icing sugar

1 tsp vanilla extract

2 eggs


For the Cream topping

300 ml whipping cream

100g icing sugar

1/2 tsp vanilla extract

150g  fresh raspberries, plus extra to decorate


For the brownie:

Preheat the oven to 170°C (or Gas mark 5)

Put the chocolate in a heatproof bowl over a pan of simmering water (do not let the base of the bowl touch the water). Stir occasionally until the chocolate is  melted.

Put the butter and sugar in a bowl and with a spoon or electric whisk beat until you have a fluffy light cream.

Add the eggs one at a time, mixing well.

Gradually beat in the flour until you get a smooth mixture. Do this for about 2 minutes on high speed with an electric whisk.

Slowly pour in the melted chocolate and mix thoroughly. Pour into the prepared baking tray and smooth over with a palette knife.


For the cheesecake:

Put the cream cheese, sugar and vanilla extract in a bowl and mix until smooth and thick. Add one egg at a time, while still mixing. The mixture should be very smooth and creamy.

For a little lighter and fluffier mixture, beat the cream at high speed for 1 minute with an electric or manual whisk, but be careful not to over-mix, otherwise the cheese will split. Spoon on top of the brownie and smooth over with a palette knife.

Bake in the preheated oven for 30–40 minutes, or until the cheesecake is firm to the touch and light golden around the edges. The centre should still be pale. Leave to cool completely, then cover and refrigerate for 2 hours at least.

For the cream topping:

Put the cream, sugar and in a bowl and whisk or beat until firm but not stiff.

Mince up the raspberries with a fork (keeping 12 or so back for decoration) and stir into the cream.

Turn the brownie out onto a board and turn the right way up.

Spread the topping evenly over the brownie, cut into portions and decorate with more raspberries.

Adapted from the  Humming Bird Bakery Cookbook 


Green Fig Salad


It was only during my first trip to Trinidad as a teenager that I realised the sheer variety of bananas that existed. Most of us are familiar with the Chiquito variety of medium sized bananas and a few more with yellow plantain and even green banana. But Trinidad introduced to me red skin banana, sour tasting banana, short fig and cooking fig. I think I’ll work with the 3 I know for now.

This recipe is a typical alternative to potato salad in Trinidad. The firm starchy texture of the green banana makes it a usual candidate for  Metemgee; but it works really well in this salad as it resembles the waxy texture of new potatoes.  It’s also packed with vitamin C, B6 and Potassium, so don’t feel guilty serving yourself a larger portion.

Green Fig Salad

  • Servings: 2
  • Difficulty: easy
  • Print


Ingredients:

3 Green bananas

3 tbsp Garlic Mayonnaise

1/2 carrot cut into cubes

2 tbsp frozen peas

1 tsp English Mustard (optional)


Method:

Cut the banana into thirds with skin still on and boil in a pot of salted water for 15 minute or until firm. Remove from the stove, drain the water, replace with cold water to help it to cool down.

In the meantime take the carrot and boil in some water in a pot until tender. Drain water.

Take each of the banana pieces, remove the skin, slice down the middle then into chunks (1″ pieces). Place in a bowl with the carrots, peas and mayonnaise. Mix well, season to taste and serve.