Quick Golden Multi-seed Bread

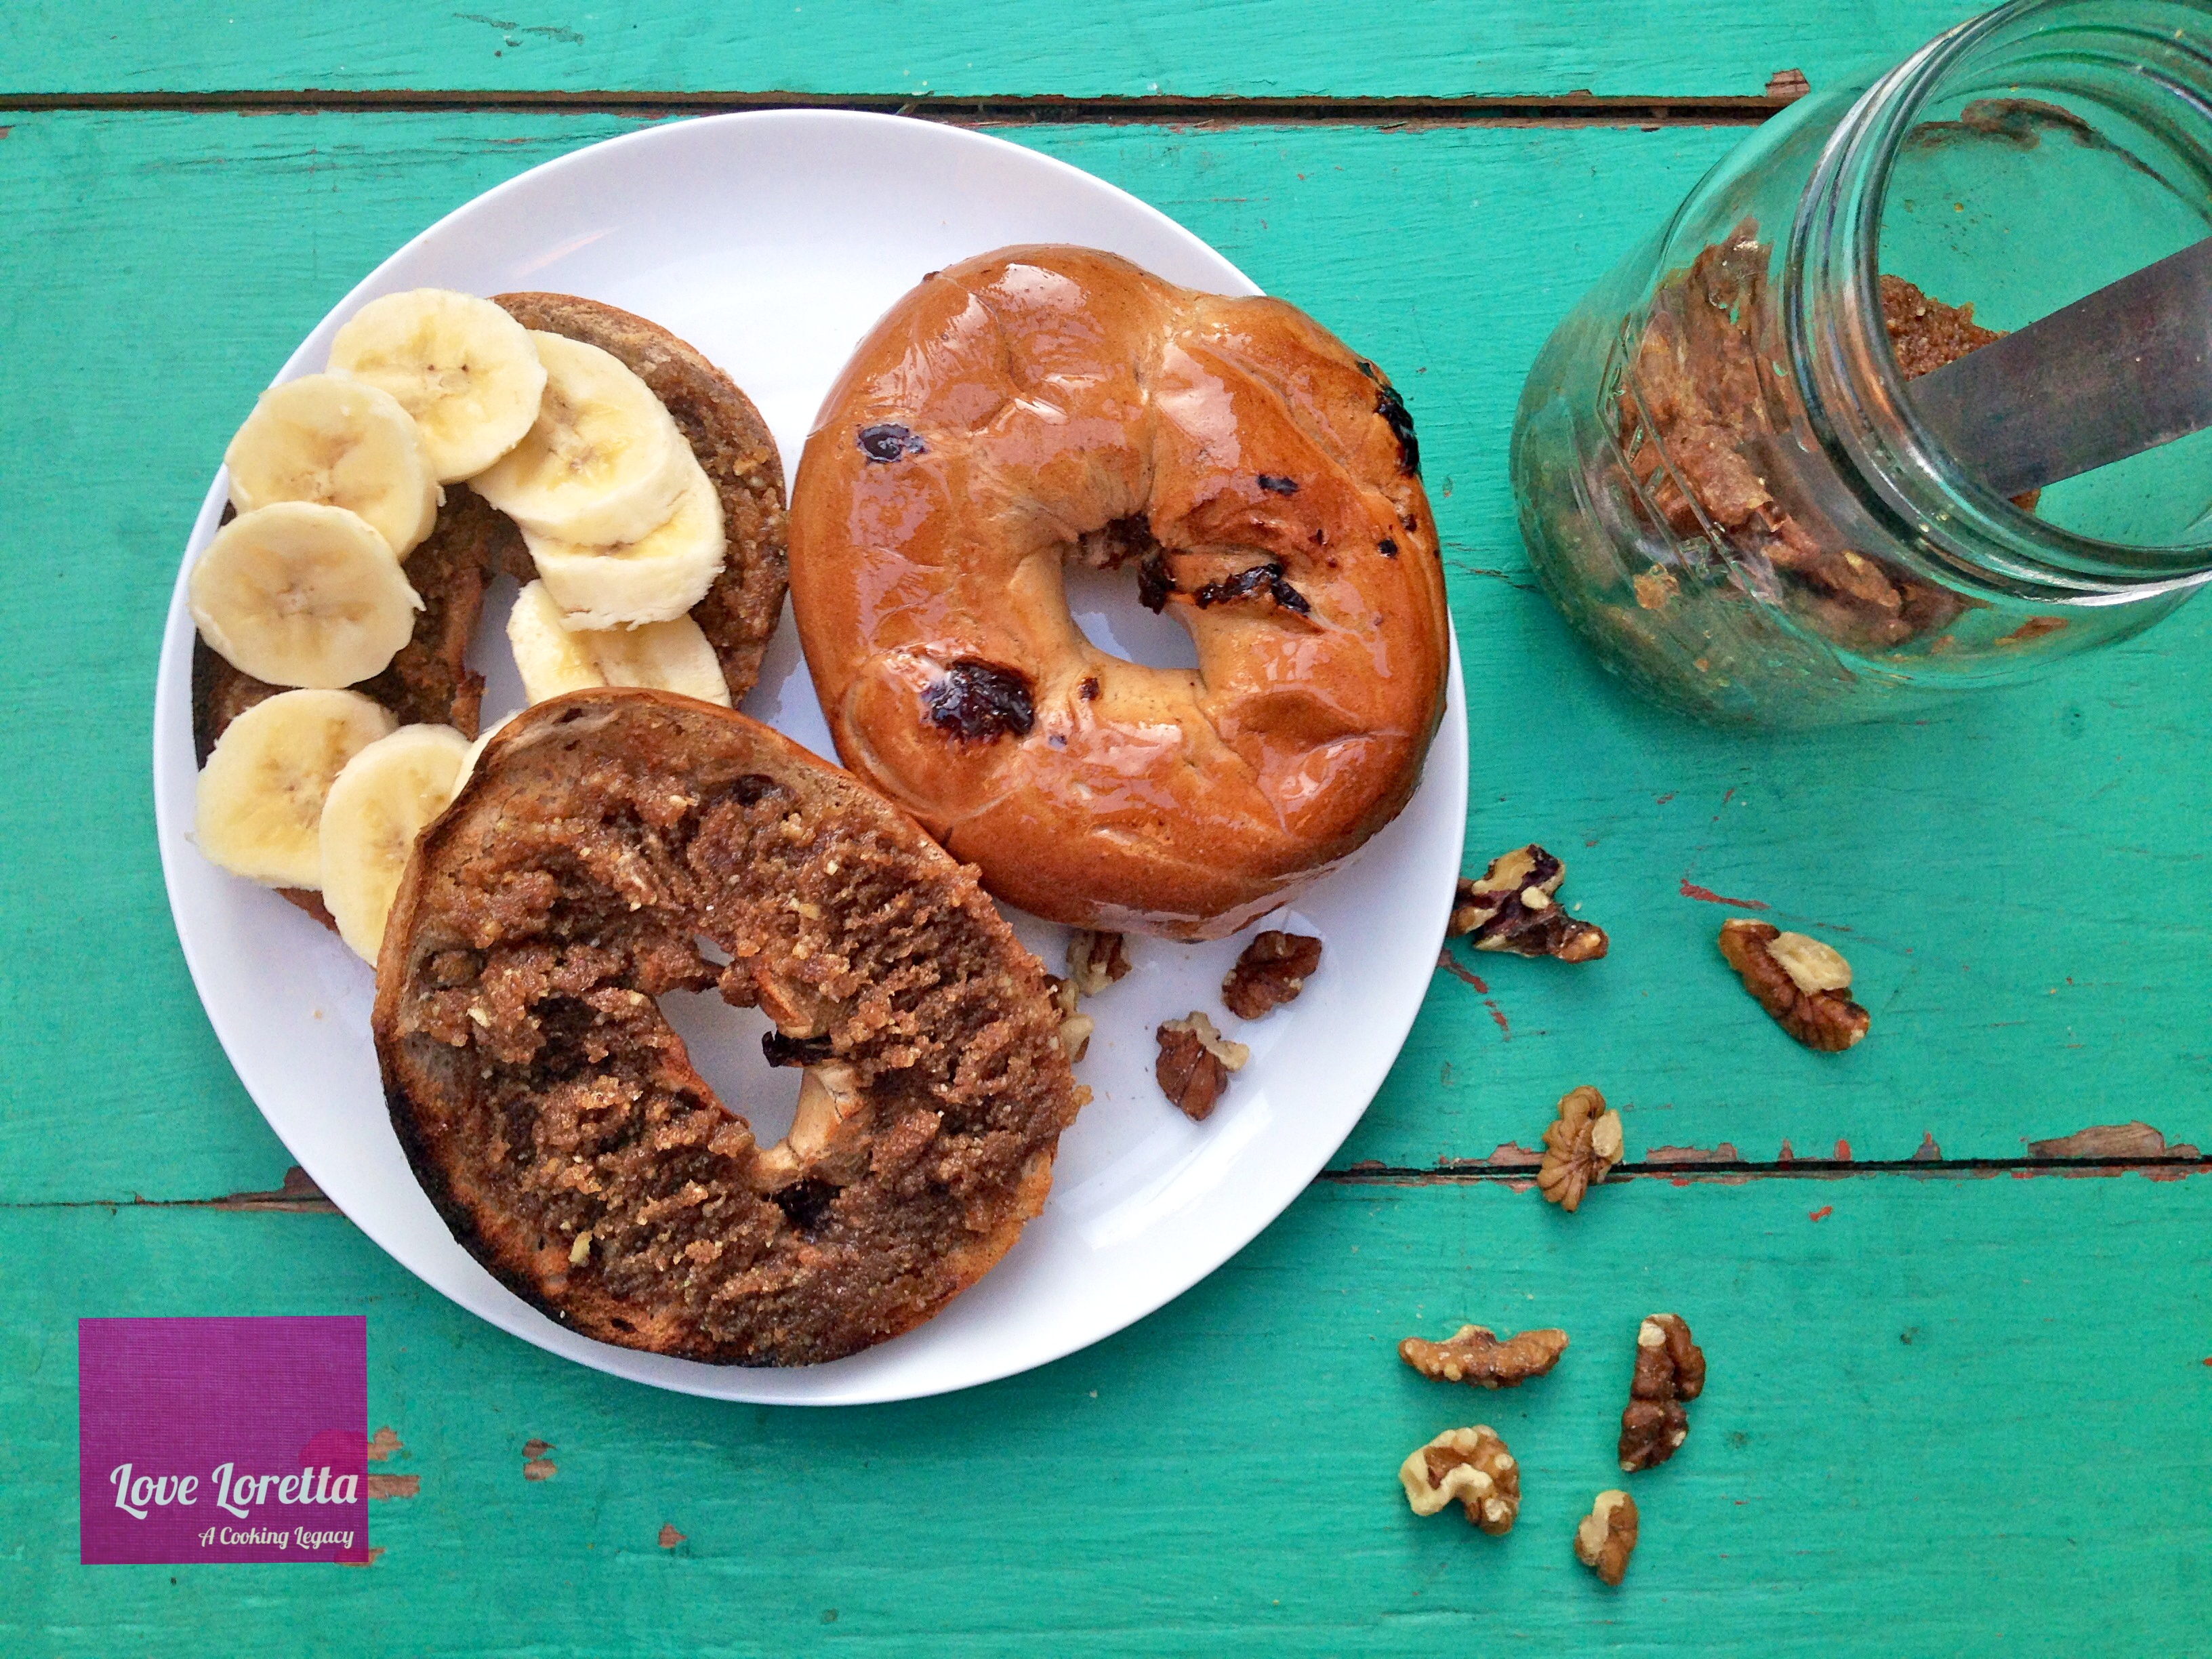
There is nothing more appealing than the smell and look of fresh bread from straight out the oven. It sends you drooling, scrambling for the bread knife or the first opportunity to rip a piece out of its side to smother it with cool butter, jam or chocolate spread. In this case chocolate spread won: it was a delicious combination of Nutella with the crunchy seeds and malty taste of the fluffy bread that made my midday brunch most satisfying.

And to think that only a couple of hours earlier this loaf of bread was merely a packet of bread mix, olive oil and a bit of water away from becoming delicious! This is probably the most surprisingly tasty bread mixes I have made: the dough turned into deep caramel the moment I started to add water to the mix. I was also tempted at some stage to add honey to the mix, in fear the bread would be bland, but it wasn’t necessary. The bread was fluffy and had a slight sweetness to it.

The following day the bread was a little firmer, probably because I put it in the fridge wrapped in cling film. This actually made it good for toasting. Every once in a while it’s nice to treat yourself to some home made bread, the downside is you feel obliged to eat it all yourself so I would recommend making rolls so that you can share it among your friends and family.

Golden Multi-Seed Bread

Ingredients:

1 packet of Sainsbury’s Golden Multi-seed Bread Mix

15 ml Olive Oil or 25g butter

320 ml luke warm water

Method:

(to bake by hand0

1. Rub the bread mix with the butter or oil in a bowl with your fingertips until the mixture resembles fine breadcrumbs. Gradually add the water to form a soft dough.

2. Knead well on a floured surface for 10 minutes until smooth and elastic, then place it back in the bowl, cover with lightly oiled cling film. Leave the dough in a warm place for one hour to rise and double in size.

3. Knead well again on a floured surface for a few minutes, place in a greased 2lb loaf tin. Or shape the dough into 8 equal sized balls and placed in a round tin (as pictured above).

Cover with lightly oiled cling film. Leave the dough in a warm place for half an hour to rise again and increase in size. Preheated oven 230oC/450oF/Gas mark 8

4. Remove cling film and bake in the top of the ovenfor 30 minutes or until golden brown. Then brush with melted butter to give the warm bread a glossy shine and buttery taste.

Advertisement

Spiced Walnut Butter


If your anything like me, walnuts haven’t rated too highly on my ‘nut list’ either. But did you know that walnuts have the highest amount of omega 3- fatty acid of any nut? In other words it’s the all round hair, skin and nail food. Now does it sound a bit more appealing? Ok well I tried.

I still believe the walnut has the right to be released from the prison of banana breads and festive nut trail mixes; it has a hugely bold even bitter flavour, I agree, but when combined with sweet cinnamon and nutmeg, it seems to mellow down to a smooth pecan like taste. I say make the most of that trail mix and create the most irresistible butter you would have ever tasted. I’ve been enjoying it all week and feeling good!

This recipe can keep for up to 2 weeks if stored in an air tight glass jar in the fridge. This recipe makes just over a cup of walnut butter. Enjoy!


Spiced Walnut Butter

Ingredients

3 cups of raw walnuts
pinch of salt
40 mls Maple Syrup
1 tsp vanilla extract
1/4 tsp ginger powder
1/2 tsp cinnamon
1/2 tsp grated nutmeg
2-3 tsp liquid coconut oil

Method

Pre-heat the oven to Gas Mark 4 (350F). Place the walnuts on a baking tray and toast in the oven for 5-7 minutes. Watch them carefully as you don’t want them to go brown. Set aside to cool.

In a food processor, place the other ingredients and add the walnuts. Blend on a high speed until you have the consistency you want: crunchy or smooth butter. Taste the mixture and add more syrup or spice if desired.

Serve with warm toast or bagels.

Nutritional value of Spiced Walnut Butter.

Spiced Walnut Butter(2 tbsp)
Calories(Calories from fat) 258
Sodium 2 g
Total Fat 19 g
Potassium 42.8 mg
Saturated Fat 2 g
Total Carbs 17.4 g
Polyunsaturated 2 g
Dietary Fibre 3.2 g
Monounsaturated 3 g
Sugars 11.9 g
Protein 5 g
Zinc 5.5%
Calcium 4.8%
Manganese 33%
Iron 5% 9.3%

*Percent Daily Values are based on a 2000 calorie diet. Your daily values may be higher or lower depending on your calorie needs.

Vanilla Cardamom infused Mango w/ Honeyed Greek Yoghurt


Greek Yoghurt has become my new obsession, especially now that I appreciate its health benefits a bit more. I have always been a lover of yoghurts: my family of 6 was split cleanly down the middle; 3 gulped it down by the gallons, the others couldn’t care less.

I experimented with soya yoghurts and even coconut ones for a while, the latter tasting mega delicious, but at £3 a small pot I couldn’t sustain it for too long. Maybe I’ll experiment a little with making my own…who knows. But in the meantime, this recipe works just fine. If you want to preserve some of the nutrition from the mangoes, you might only want to poach it gently, remove the fruit and then allow the liquid to simmer to a syrup like consistency.


Vanilla Cardamom infused Mango w/ Honeyed Greek Yoghurt


Ingredients:

1 Ripe Mangoes - cut into large chunks (1 cups)

1 tbsp honey

1 Vanilla Pod

1 cup water

1 cardamom pod - crushed


1 cup Greek yoghurt

1 tbsp honey


Method

Take the yoghurt and honey, blend together and set aside or place in the fridge to keep cool.

Take the remainder of the ingredients and place them in a pot. Simmer the fruit for 8-10 minutes. You can remove the fruit after 3 minutes to allow the liquid to thicken. Once you have the desired consistency remove the cardamom pod and transfer the fruit to a bowl to cool before serving with the yoghurt.


Nutritional Value of Mango w/ Honeyed Greek Yoghurt

Mango Greek Yoghurt Honey(2 tbsp)
Calories(Calories from fat) 107 100 120
Sodium 3 mg 65 mg 1 mg
Total Fat - - -
Potassium 257 mg - -
Saturated Fat - - -
Total Carbs 28 g 7 g 17 g
Polyunsaturated - - -
Dietary Fiber 3 g - -
Monounsaturated - - -
Sugars 24 g 7 g 16 g
Protein 1 g 18 g -
Vitamin A 25% - -
Calcium 2% 20% -
Vitamin C 76% - -
Iron 5% 1% - -

*Percent Daily Values are based on a 2000 calorie diet. Your daily values may be higher or lower depending on your calorie needs.


Delicious Peanut Flax Granola

Rome was not built in a day, neither was Granola, or so it seemed. The secret to good granola is to cook it slow and low!

I learn from my mistakes very quickly! The first time I made this, I put the oven on so high, the granola cooked to a crisp; rather than throw all my hard work away, I grimaced and ate the bitter cereal the rest of the week. Never again.

Top tip: after 20 minutes in the oven, take it out and turn the mixture, making sure to push the granola from the edges inward toward the middle. Then place it back in the oven for another 10 minutes. Remove and stir it one final time before returning it to the oven for the last 10 minutes: a total of 40 minutes!

Long wait but the reward is so great; your breakfasts (or even snacks) will leave you feeling so satisfied. You can thank me later…enjoy!

Peanut Flax Granola

Ingredients

* Pre-heat oven to 275 degrees

3 1/2 – 4 cups Whole rolled porridge oats

1/2 cup pecan nuts - roughly chopped

1/2 cup cashews, roughly chopped

1/4 cup golden flax seeds

2 tbsp almond meal

1/4 cup sunflower seeds

1/2 cup raisins (or your choice of dried fruit)

1/4 cup peanut butter,

1/4 cup vegetable oil

1/4 cup pure maple syrup

2 tbsp brown sugar

1/2 cup water

2 tsps vanilla extract

1 tbsp almond extract

1 tbsp cinnamon powder

Pinch of salt

Method: 

1. Combine all dry ingredients (minus the raisins and brown sugar) in a large mixing bowl

2. Combine all wet ingredients plus the brown sugar in a small sauce pan and stir occasionally until simmering. Simmer for a few minutes until it starts to thicken.

3. Pour hot mixture slowly over oat mixture and stir until the mixture is moist and the liquid is evenly distributed throughout.

4. Spread mixture evenly onto heavy baking tray and place on middle rack in heated oven.

Total baking time is 40 minutes - Remove from the oven and place a clean, heavy pan on top of the granola while it’s cooling.

Now you can break apart, add to a large bowl and add the raisins or any other dried fruit. - Keep in air tight container.

Blueberry Scones

I was hunting around as I usually do, looking for something different to do with Blueberries. I normally throw them into smoothies, and I remember once making a blueberry drink for a friend’s dinner. And now come to think of it I also made a blueberry sauce to go with some quick pancakes when my Uncle came down to spend some time with us (you know those pancakes you make and they turn out so nice…but you can’t remember how you did it? It was one of those days).  Ok so I’ve kind of lost the argument: I have done a few things with Blueberries, but I have to say these scones excite me the most. Not only are they really quick and simple to make but extremely tasty!  To speed up the process, this can be made in a food mixer.

Blueberry Scones

  • Servings: 8
  • Difficulty: easy
  • Print
Ingredients
2 cups all-purpose flour
1/2 cup sugar
1 tablespoon baking powder
1 teaspoon kosher salt
1 tablespoon grated orange zest
1 stick cold unsalted butter, grated
1 large egg, lightly beaten
1 tsp Vanilla extract
1/2 cup cold heavy cream
1 cup blueberries, fresh or frozen
extra heavy cream for brushing the tops
raw sugar for sprinkling the tops
Method

Pre-heat the oven to 400 degrees F.

In the bowl  mix 2 cups of flour, 1/2 cup sugar, the baking powder, orange zest, and salt. Then add the cold butter and mix well. In another bowl, combine the egg, vanilla and heavy cream and whisk well.  Slowly pour cream into the flour and butter mixture. Mix until you see no more lumps.  Now add the blueberries to the dough, together. You might want to use your hands it this point to avoid the berries bursting prematurely.

Spoon out the dough onto a well-floured surface and knead it into a ball.  Then with a rolling pin roll the dough about 3/4-inch thick into a circle shape.

Cut the dough into quarters then cut again into eighths, diagonally, making triangles.

Brush the tops of the scones with heavy cream, sprinkle with sugar and bake for 20 to 25 minutes, until the tops are browned and the insides are fully baked. The scones will be firm to the touch.

Adapted from recipe by La Petite Brioche

Authentic Brioche

Brioche can be enjoyed any day of the week. But it tastes so much better freshly baked on a Sunday morning. While the loaves were baking in the oven, their buttery scent has a way of drifting upstairs and filling the house with warmth. So nice! I wanted to bake this bread weeks ago but time wouldn’t allow me to do it. Brioche demands patience. People often ask me how do I find the time to cook/ bake ? The simply response is day and night: first thing in the morning, last thing at night. So for the Brioche and Jelly this is how I squeezed it in: I got home late Saturday evening and mixed the dough as it needs a good 7 hours or more to rest.

Then I woke up early this morning after spending a few moments connecting with my Creator; and took the dough out the fridge for an hour for it to get to room temperature. I shaped the dough and then went to the park and did an hour run (as I knew the dough would need at least 3 hours to rise).

When I came back I started on the grape jelly. Then I did some domestic tasks and  returned to the kitchen to put the loaves in the oven.  At the end of the day you just have to maximise the time that you have. And in the end the reward is great: crusty buttery bread with a fluffy texture served with sweet black grape jelly and spicy hot chocolate. Now to the park to catch up on some reading…

Recipe taken from How to Bake by Paul Hollywood published by Bloomsbury.

Brioche

  • Servings: Makes 2 medium loaves
  • Difficulty: easy
  • Print

Ingredients

500g strong white bread flour, plus extra for dusting 7g salt

50g caster sugar

10g instant yeast

140ml warm full-fatmilk

5 medium eggs

250g unsalted butter,softened, plus extra for greasing

1. Put the flour into the bowl of a mixer fitted with a dough hook. Add the salt and sugar to one side of the bowl and the yeast to the other. Add the milk and eggs and mix on a slow speed for 2 minutes, then on a medium speed for a further 6–8 minutes, until you have a soft, glossy, elastic dough. Add the softened butter and continue to mix for a further 4–5 minutes, scraping down the bowl periodically to ensure that the butter is thoroughly incorporated. The dough should be very soft.

2. Tip the dough into a plastic bowl, cover and chill overnight or for at least 7 hours, until it is firm and you are able to shape it.

3. Grease two loaf tins.

4. Take your brioche dough from the fridge and tip it onto a lightly floured surface and fold it in on itself a few times to knock out the air. Divide it into 2 equal pieces. Then divide each piece into three more pieces.

Take each piece of dough and roll into 12″ tubes. With three on the tubes, start plaiting the dough starting from the centre working your way to the end, sealing the end. When you have plaited one side, flip the plait over and plait the other side to the end. Then moisten along one side of the plait with water and join the ends together.

Then place the folded plait into the loaf tin. Repeat the process again with the other piece of dough.

5. Cover the loaf tins with a clean plastic bag and leave to prove for 2–3 hours, or until the dough has risen to just above the rim of the tin.

6. Heat your oven to 190 c (gas mark 4-5)

7. When the brioche is proved, bake for 20–30 minutes (in the middle shelf) or until a skewer inserted into the centre comes out clean.

Bear in mind that the sugar and butter in the dough will make it take on colour before it is actually fully baked. Remove the brioche from the tin and cool on a wire rack. Serve warm or at room temperature.


Copyright © Ranette Prime and Love Loretta’s Kitchen, 2014. All rights reserved.

Salt fish Fritters

Salt fish Fritters are a stable of most Caribbean households. Some eat it for breakfast, as a snack with bread or on its own. Unlike fish cakes which are made of a mixture of potato and cooked fish, saltfish fritters are made with flour and pack in a lot more flavour which makes them very filling. The end product should be crispy on the outside and soft on the inside.

These fritters have the most flavour out of any fritter I have tasted recently and the key to this is a couple of things: grate all your ingredients where stated, that way all the flavour will be well-distributed into every bite.

Secondly taste as you go along, yes taste the dough, that is the only way to achieve the flavour you want, because once you start frying there is no turning back. You can also adjust the measurements and flavours as you see fit, provided the texture of the dough is not too stiff or runny (do a sample fry first), this should take no more than an hour to complete.

For the recipe e-mail me at: lovelorettaskitchen@gmail.com