Ethiopian Lentil Stew (Misir Wot)

If you can’t stand the heat, then you better stay out the Ethiopian Kitchen!

It’s not that Ethiopian food doesn’t have a range of mild flavoured dishes, they do, but pepper is so essential to the cuisine that to avoid it is to essentially ban yourself from the whole experience!

Ethiopian Cuisine: I haven’t tasted anything so lip-smackingly delicious in a good long time! I’m gonna be stuck on this for a while!

Ok admittedly the last time I tasted authentic Ethiopian cuisine was about a year ago where I just happened to walk by a small take away 5 minutes walk down Kingsland High Street in Dalston, London. They offer a selection of stews or ‘wots’ with a combination or rice or the infamous Injera bread, all for just £4!!

FullSizeRender (13)
Kingland High Street, Dalston, London

Many Ethiopian’s are Orthodox Christians who traditionally eat vegan on Wednesdays and Fridays, as well as other special days,  hence why there is such a wide selection of vegan/vegetarian Ethiopian dishes.

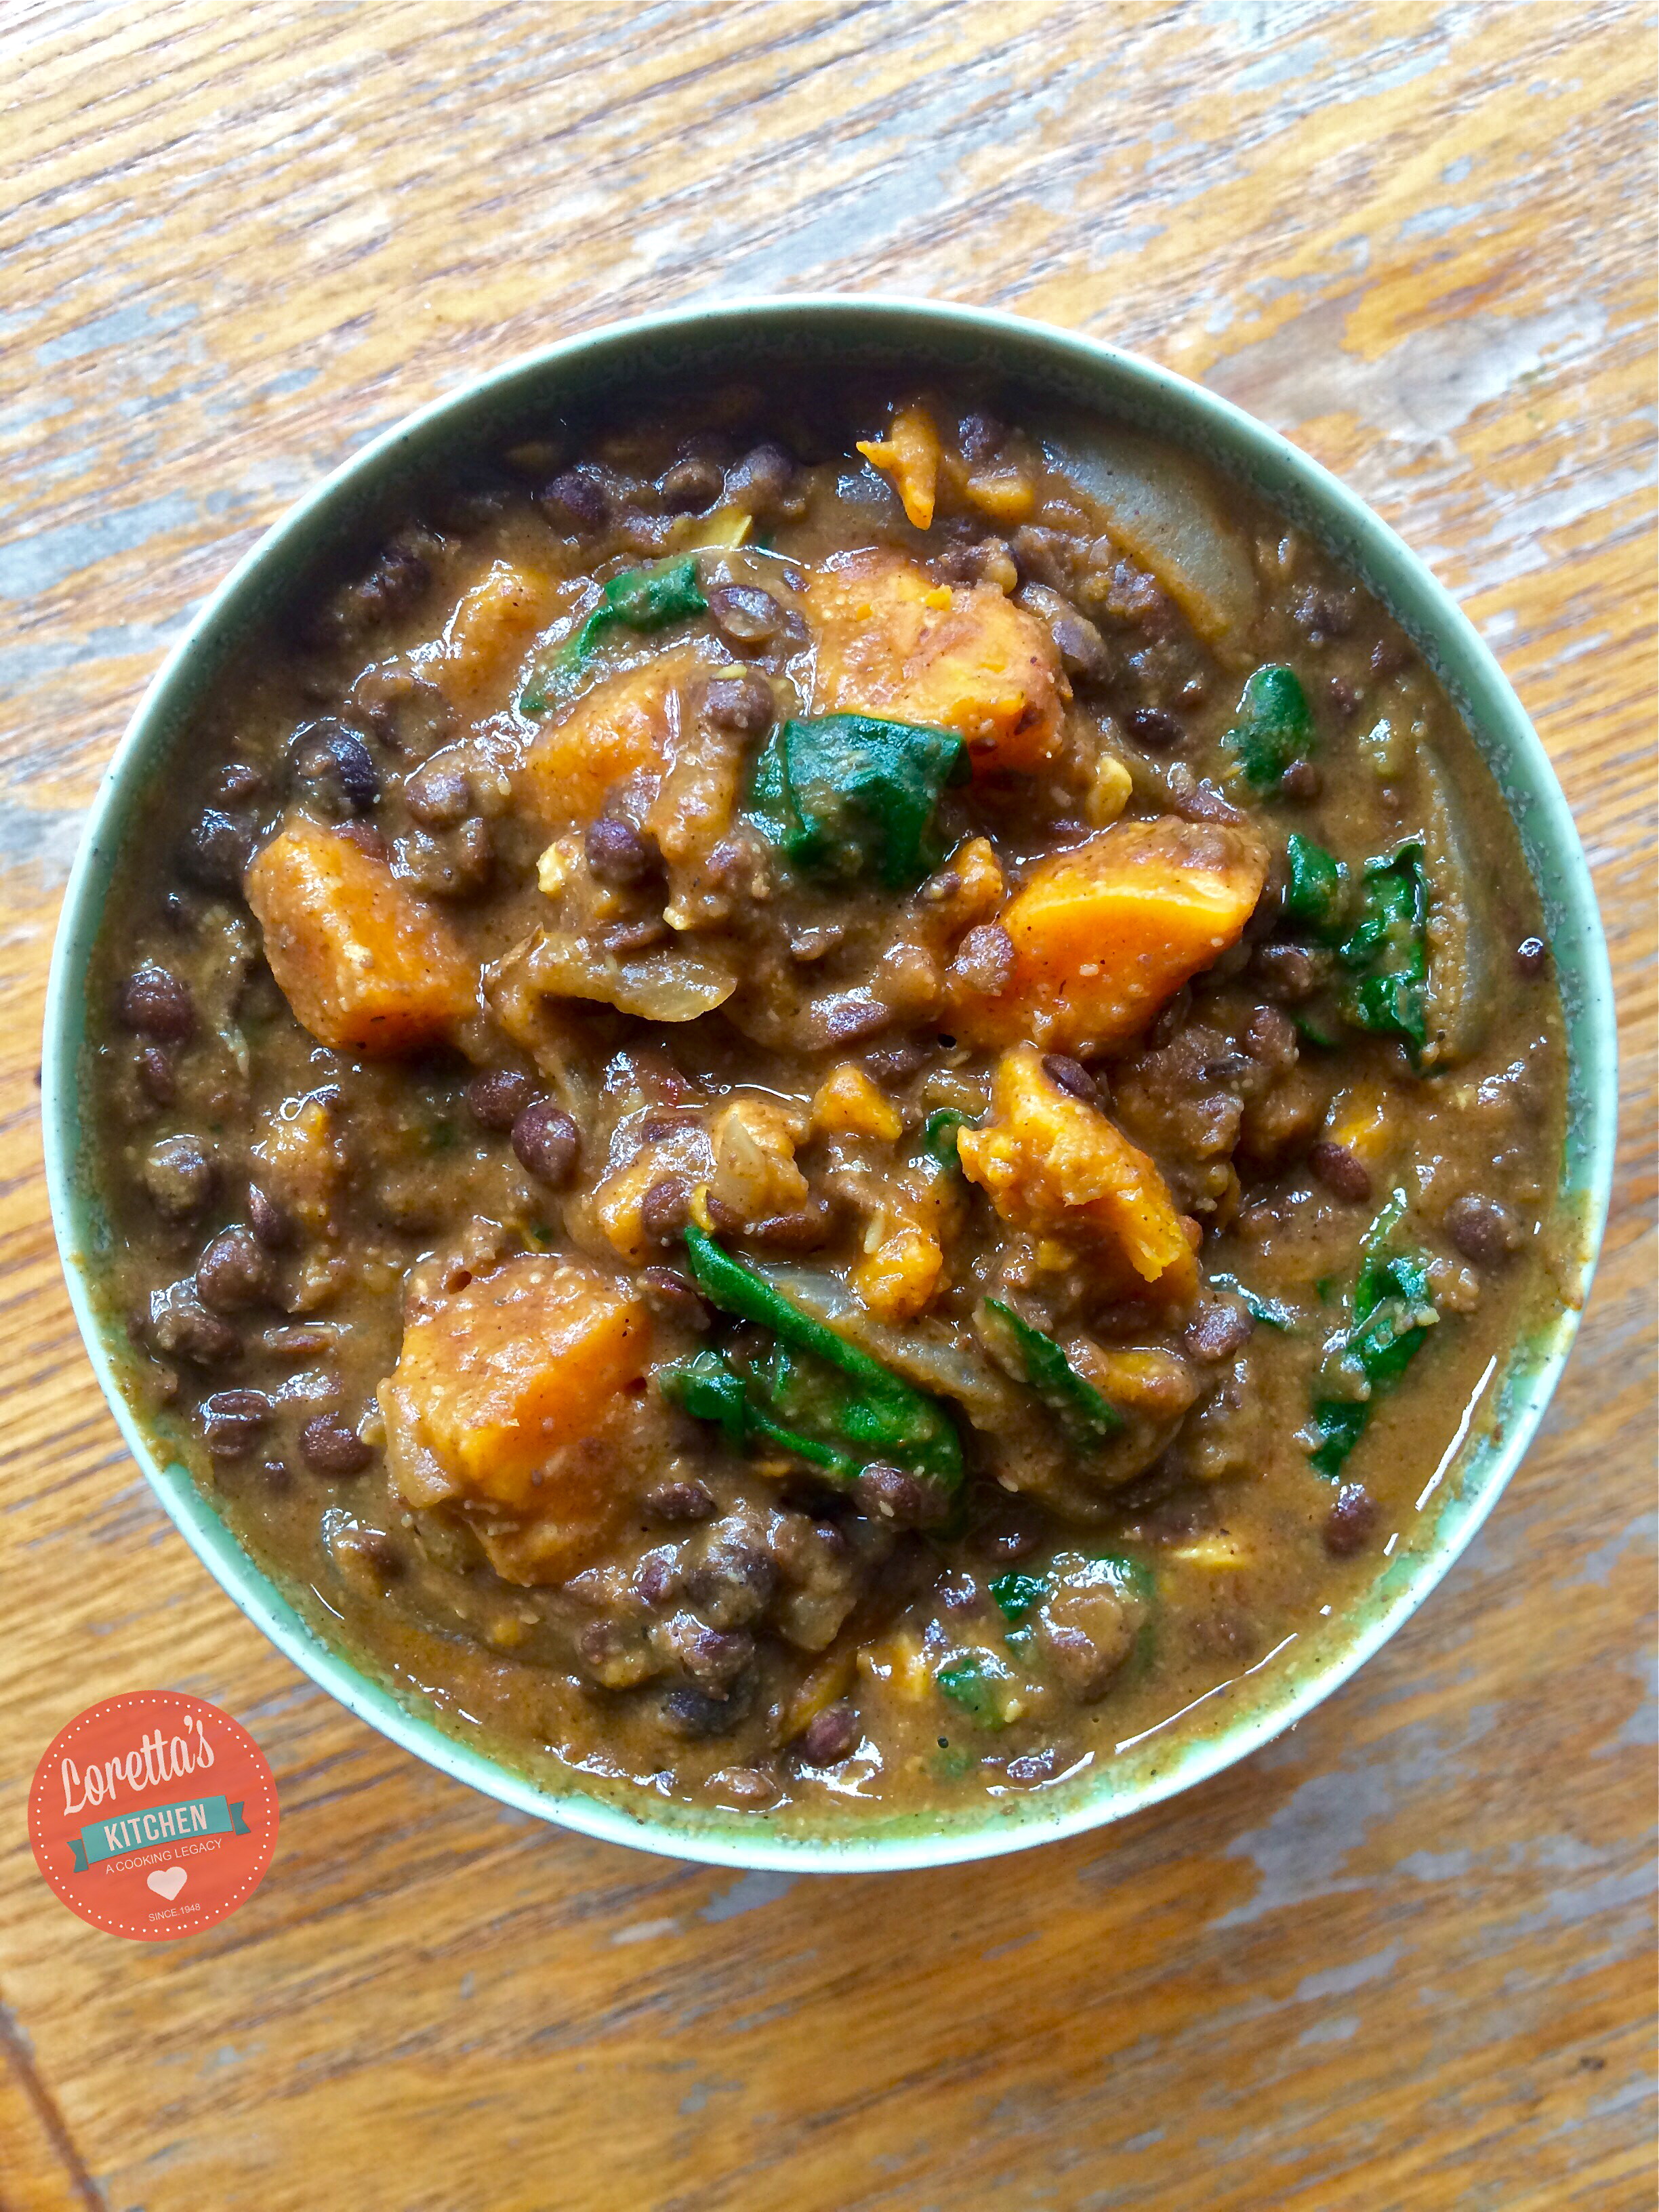
This recipe is adapted from the more classic Misir Wot, which literally means ‘lentil stew’; I have added sweet potato, coconut milk and spinach to this mix.

This is also my first time using my new found Ethiopian spice blend home made brebere which I made virtually a few minutes before assembling this dish. I didn’t taste the stew till the very end, and when I did, let me tell you I almost burnt my mouth going for a second helping, I was surprised! With such a wide range of spices all packed in one blend, I was expecting a bitter, confused taste, instead - pure harmony, I could taste everything, not overpowering at all. So step away scotch bonnet! There’s a new kid in town!

More Ethiopian dishes to come!


Ethiopian Lentil Stew (Misir Wot) 


INGREDIENTS

2 medium sized sweet potatoes - cut into chunks

1/2 white onion, sliced

2 large garlic cloves - crushed

1 tsp finger chopped fresh ginger

1 tbsp coconut oil - frying

1 1/4 cup green lentils - pre-cooked

1 tbsp Tomato Paste or 2 plum tomatoes (crushed) with a little juice

2 1/2 tsp of Homemade Berbere Spice

1 cup Coconut Milk

2 cups of boiling water

1 chicken or vegetable stock jelly

3-4 Pimento Seeds

1 generous handful of spinach


METHOD

  1. In a bowl dissolve the stock jelly in the 2 cups of hot water with the pimento seeds. Set aside.
  2. Soften the onions slowly in a deep pot with the coconut oil for 5-6 minutes
  3. Add the garlic and ginger - 2 minutes
  4. Stir in the berbere spice, take it off the fire to allow it to slowly cook
  5. Return the pot to the fire and add the tomatoes, allow it to reduce for 2 minutes, until the water has evaporated.
  6. Add the sweet potato and stir
  7. Add the lentils, stir (medium heat)
  8. Add the stock liquid, pimento seeds and coconut milk. Cover and allow to simmer for 10-5 minutes or until the sweet potato is tender
  9. Stir the spinach in at the end. Season to taste.
  10. Serve with rice


Advertisement

Guyanese: Pepperpot

If there was ever a dish which made me immensely proud of my Guyanese heritage, it would be this one. Pepperpot, the National dish of Guyana. Simply the bitter-sweetest, warmest, stickiest pot of stew you will ever taste. It has a taste like none other, and its all down to one main ingredient: Cassareep.

Cassareep was not as accessible in the 80’s when I was growing up as it is now; and even here, only certain West Indian shops sell it. I don’t know where we found the thick black molasses mixture when I was a child, but it was cherished like liquid black gold in our home: It would sit at the back of the cupboard, in a used Pepsi Bottle silently, waiting for the 25 December. I recall it being sealed with masking tape around its mouth and neck, as if smuggled out of the country, put on a boat destined for the Motherland…only to sit at the back of someone’s cupboard for 11 1/2 months of the year.

“Cass-a-reep” I was told by my mother as she would stir the pot of generous dark meat, was invented by the Native Amerindian’s of Guyana. They would extract the juice from bitter Cassava root which is in itself poisonous to eat if not cooked properly, and then boil, and boil and boil the juice down until eventually what remained was a thick black syrup. For more information on how Cassareep is made, follow this link.

“It always tastes better the next day…” she would add smiling.  Music to my ears. Because the Amerindian’s had no refrigeration,  Cassareep’s  natural preserving properties kept the dish going for days on end (that is why pepperpot can be left on the stove, re-heated daily for days and not spoil).

Pepperpot is traditionally eaten with thick, white home-made bread and made with several types of meat. For this recipe, I limited myself to Ox-tail, but feel free to combine it with Mutton if you wish.

If you would like this recipe - just drop me an e-mail: lovelorettaskitchen@gmail.com


Guyana: Paratha Roti

Oil-roti, buss-up-shot, Dhal puri. Some of the names I have grown to associate with the iconic national dish of both Guyana and Trinidad. From the Street Vendor in San Fernando to the Blue Hut on Mount Irvine Beach in Tobago, Roti is enjoyed by everyone, everywhere. The hardest task I have found however was not in the consuming, but finding someone who could do it well (or as well as my Mother…as we would all say). And I’m sad to report that those places and people are very few and hard to find. Many make the mistake of preparing Roti much like chapatti or some other flat bread, which is fine to those who don’t know any better, but to those who can sniff a good Roti from a far off it won’t be enjoyed as well.

The key to making a good Guyanese Paratha Roti is letting the dough rest adequately between each stage. The ratio of baking powder to flour is equally important. It’s also important that you use the right utensils. A Tawah (flat iron griddle) is what is used to cook the Roti on for the best results. There are several other stages not to mention the filling which varies if you are making Dhal Puri roti or simply oil-roti (plain). But essentially it is a tedious process, but once you get the hang of it its a really convenient side dish that can be stored in the freezer and used whenever you want to.

If you would like details of the recipe below, feel free to e-mail me: lovelorettaskitchen@gmail.com and I will be sure to send you the detailed directions (with step by step pictures).

Copyright © Ranette Prime and Love Loretta’s Kitchen, 2014. All Rights Reserved. 

Sushi & Tofu

You might find it hard to believe, but I am not someone who is very adventurous when it comes to trying new foods: I like to stick to what I know. I’ve come a bit further down the line then where I was a few years a go. I never thought the day would come when I would actually enjoy snacking on cold rice which is essentially what I summed up sushi to be. I was first introduced to sushi whilst at university about 12 years ago. My housemate’s girlfriend at the time is Japanese and she would often prepare sushi at the weekend with him. She must have cornered me or something because I went from going in the kitchen to wash dishes to clapping down a ‘scrambled egg mayo’ sushi she had made. I wouldn’t say it was like fireworks in my mouth (sorry it does get better believe me), but my interest was peaked.

The second occasion was probably another 10 years after that, this time it was salmon. But again the whole ‘lets go  Yo Sushi’ vibe didn’t really sit well with me. I wanted cooked food. Until one day whilst hovering around in Sainsbury’s looking for something else, I came across a Sushi Kit. And so I thought, OK if I’m going to get over this fear of Sushi I have to take it on…and make it my own. So I apologise from now to any Sushi lovers, but I have made some adaptations. I am on the bridge, I have yet to cross over to the over side, but I can see the summit…I’m almost there.

Sushi and Tofu

  • Servings: 4 rolls (6-7 slices per roll)
  • Difficulty: medium
  • Print

For this recipe you will need:

250 g Sushi Rice

4 Nori Sheets

Bamboo Rolling Mat

Cling Film

Wasabi Paste (optional)

The method below will assume you have not bought the kit, obviously if you have the kit, you can follow the instructions there!

For the filling, I added the following:

1 Ripe Avocado sliced length ways

1 Red Sweet Pointed Pepper - sliced thinly length ways

1/2 medium onion (grated)

2 cloves garlic (minced)

1 tbsp coconut cream  or sushi vinegar (to add to the rice)

Dash Soya Sauce/ Hoisin Sauce

1 carrot sliced thinly ideally with a julienne peeler 

And for the Tofu

Firm Tofu sliced into 1/2 inch slabs (6 slices on average)

3 tbsp Soya Sauce

3 tbsp Teriyaki Sauce

2 garlic cloves minced

1/2 tbsp honey

Marinating the Tofu

Before anything else marinade the tofu. Place all the ingredients for the tofu in a saucepan and warm gently to release the flavours. Take a rough guess of how much to make depending on how many slabs of tofu you have prepared. Then pour the mixture over the tofu and making sure it is fully submerged in the marinade. Then refrigerate.

Cooking the Rice

Put the rice into a bowl and wash with cold water. Repeat 3 or 4 times and then drain rice in a sieve. Add 330 ml of water and the washed rice to a saucepan. Bring the rice to the boil and simmer for 10 minutes with the lid on. Turn off the heat and leave to stand for 15 - 20 minutes. Do not open the lid!

While the rice is cooking, and this is entirely optional gently stir fry the peppers and carrots in with the onion and garlic and Hoisin sauce. You still want the vegetables to be crunchy, you are simply flavouring the vegetables before adding them to the rice later. Remove the vegetables from the saucepan and allow them to cool completely.

Layering and Rolling

With the rice still warm, stir in the coconut cream or the sushi vinegar if you prefer. Then let it cool down further. Then set up your equipment: on a hard surface place lay out a clean tea towel for stability. Then place the sushi rolling mat with the lines facing horizontally. Following that, cut some cling film so that its slightly larger than the rolling mat (by 1 inch or two). Then take a Nori sheet and place this on the mat also.  Then take some spoonfuls of rice place then randomly over the Nori sheet, and with your fingers spread the rice out until you have a thin layer covering the sheet.

Next comes the layering, I decided on this order: peppers, carrots and avocado, thinking about how it would look once sliced. I also added a slight drizzle of the marinade from the peppers and carrot. The key is to place the vegetables one inch from the edge and then roll the sheet and mat away from you as if you were rolling up a sleeping bag: tucking it in tightly as you go along.

You should leave about 1/2 an inch around the sheet ‘green’ so that you can seal the sushi roll when you reach the end with water if necessary, When you get to the end of the sheet give the sushi a final roll in the mat to even out the shape, the cling film should be fully wrapped around it by this time. Then twist the two end like a sweetie wrapper.  Place each of the rolls in the Fridge. When this is done, place the Tofu in the oven or under the grill for 10-15 mins. By the time the Tofu is ready the Sushi should be cool enough to slice into 1 inch sections.

Serve with wasabi paste, or pickled ginger or soy sauce. Try alternative fillings e.g. crispy salmon and cucumber.

Salt fish Fritters

Salt fish Fritters are a stable of most Caribbean households. Some eat it for breakfast, as a snack with bread or on its own. Unlike fish cakes which are made of a mixture of potato and cooked fish, saltfish fritters are made with flour and pack in a lot more flavour which makes them very filling. The end product should be crispy on the outside and soft on the inside.

These fritters have the most flavour out of any fritter I have tasted recently and the key to this is a couple of things: grate all your ingredients where stated, that way all the flavour will be well-distributed into every bite.

Secondly taste as you go along, yes taste the dough, that is the only way to achieve the flavour you want, because once you start frying there is no turning back. You can also adjust the measurements and flavours as you see fit, provided the texture of the dough is not too stiff or runny (do a sample fry first), this should take no more than an hour to complete.

For the recipe e-mail me at: lovelorettaskitchen@gmail.com