Raspberry Cheesecake Brownie


Someone once said that the best things in life come in threes like friends, dreams and memories. I would like to stick this cake at the end of that quote, because the three layers that make up this sweet sandwich will be a close memory I hope to never wake up from.

This cake has something for everyone: when I brought this cake into work Monday morning, the winning layer appeared to be the soufflé type raspberry cream topping. Others favoured the dense texture of the brownie and a small minority enjoyed the fluffy and  slight saltiness of the layer of cheesecake.

My eyes are immediately drawn to the creamy top if I’m honest; I’m not one for things being symmetrical and in order, but I have to say I love how the contrasting textures hold together forming this perfectly layered square.  I was a little nervous baking the brownie and the cheesecake together,  fearing one would bleed into the other forming some kind of marble effect. But as long as you keep the cake in the fridge, the cream will keep on top of the cake and keep its shape for a good 6 hours.


Rasberry Cheesecake Brownie

  • Servings: 12
  • Difficulty: easy
  • Print


Ingredients:

For the Brownie 

200g Sainsbury’s Belgian dark chocolate chips

200g unsalted butter (softened)

250g icing sugar

3 eggs

110g plain flour


For the Cheesecake

400g cream cheese

150g icing sugar

1 tsp vanilla extract

2 eggs


For the Cream topping

300 ml whipping cream

100g icing sugar

1/2 tsp vanilla extract

150g  fresh raspberries, plus extra to decorate


For the brownie:

Preheat the oven to 170°C (or Gas mark 5)

Put the chocolate in a heatproof bowl over a pan of simmering water (do not let the base of the bowl touch the water). Stir occasionally until the chocolate is  melted.

Put the butter and sugar in a bowl and with a spoon or electric whisk beat until you have a fluffy light cream.

Add the eggs one at a time, mixing well.

Gradually beat in the flour until you get a smooth mixture. Do this for about 2 minutes on high speed with an electric whisk.

Slowly pour in the melted chocolate and mix thoroughly. Pour into the prepared baking tray and smooth over with a palette knife.


For the cheesecake:

Put the cream cheese, sugar and vanilla extract in a bowl and mix until smooth and thick. Add one egg at a time, while still mixing. The mixture should be very smooth and creamy.

For a little lighter and fluffier mixture, beat the cream at high speed for 1 minute with an electric or manual whisk, but be careful not to over-mix, otherwise the cheese will split. Spoon on top of the brownie and smooth over with a palette knife.

Bake in the preheated oven for 30–40 minutes, or until the cheesecake is firm to the touch and light golden around the edges. The centre should still be pale. Leave to cool completely, then cover and refrigerate for 2 hours at least.

For the cream topping:

Put the cream, sugar and in a bowl and whisk or beat until firm but not stiff.

Mince up the raspberries with a fork (keeping 12 or so back for decoration) and stir into the cream.

Turn the brownie out onto a board and turn the right way up.

Spread the topping evenly over the brownie, cut into portions and decorate with more raspberries.

Adapted from the  Humming Bird Bakery Cookbook 


Advertisement

Guyanese: Pine Tarts

A friend of mine ‘returned home’ to get married in Guyana and a couple of our mutual friends joined her for the experience. For most of them, this was their first trip to Guyana; although of Caribbean descent themselves, I had to admit I was slightly nervous for them as Guyana is a very different experience to say Jamaica and Trinidad and so I was interested to hear their take on the country, especially as I hadn’t seen the country for over 10 years myself.

They all came back smiling I am pleased to say, not only for our friend whose wedding was beautiful and heart warming, but also for the love of the country. “Those Pine Tarts were so amazing!” recalled one of my friends, also the Chief Bridesmaid at the wedding. “And although I don’t eat a lot of meat, I really enjoyed the pepperpot stew”.

I was curious to hear how much Guyana had really developed since I last visited. When I was there, it felt very rural yet lively with friendly, approachable people and social events that brought out the whole community. But those Pine Tarts, yes I had to agree, are pretty good. My mother use to make these during the summer holidays once the school term was done and would sometimes pack them into our bags for summer play-scheme.

Pine tarts a very easy to make with either fresh or canned pineapple. The sweet pastry really holds the filling together and tastes just as good as the jam inside. So if you have time during the summer holidays, I would recommend setting aside an hour or two to make some of these tarts for the family. You won’t regret it.

Guyanese: Pine Tarts

  • Servings: 6
  • Difficulty: easy
  • Print

Ingredients: 

For the Pineapple Filling

425g Pineapple Chunks (or fresh pineapple chunks)

3/4 cup granulated sugar

1/4 tsp cinnamon powder

1/4 tsp ginger powder

1/4 tsp grated nutmeg

1/2 tsp Vanilla essence

For the Pastry

1/2 cup salted butter (soft)

1/2 cup of vegetable shortening

2 3/4 cups plain flour

2 tsp sugar

pinch of salt

1 egg (egg wash)

3/4 cup ice cold water

Method

The filling

1. If you are using fresh pineapple, then peel and cut the pineapple into large chunks and transfer into a food blender, pulsate for a minute until you have small lumps. You want to then measure out 2 1/2 cups of pineapple from that to use in the filling.

2. If using pineapple from a can, take the fruit and half of the juice and pulsate in the blender until you have small lumps.

3. Place the fruit into a sauce pan with the remaining juice and the spices and sugar. Simmer slowly for 30 mins under a low to medium heat or until the mixture thickens to a jam like consistency. Keep stirring regularly to avoid it burning. When ready, remove from the heat and set aside to cool down completely.

The dough

4. Place the flour, butter, salt and sugar in a bowl and mix together until it forms a crumbly texture. Then little by little, add the cold water until you can form a dough. Knead the dough to a  smooth log (about a foot long), wrap in cling film and refrigerate for between 30 minutes and 4 hours before use. When you are ready to use it, leave the dough out the fridge for about 30 minutes to get to room temperature.

The assembly

5. Cut the log into 1 inch thick rounds, flour your work surface and roll the dough out into a 6″ circle (I used a plate).

6. Place 1 1/2 tablespoon of pineapple filling into the middle of the circle and brush the edges with egg wash.

7. Fold the corners of the dough into the middle, to form a triangle. ensure the ends are sealed, you can use a fork to do this.

8. Brush the top with egg wash and sprinkle with sugar (optional)

9. Bake in the oven (Gas Mark 5) for 20 minutes or until golden brown.

10. Serve hot or cold.

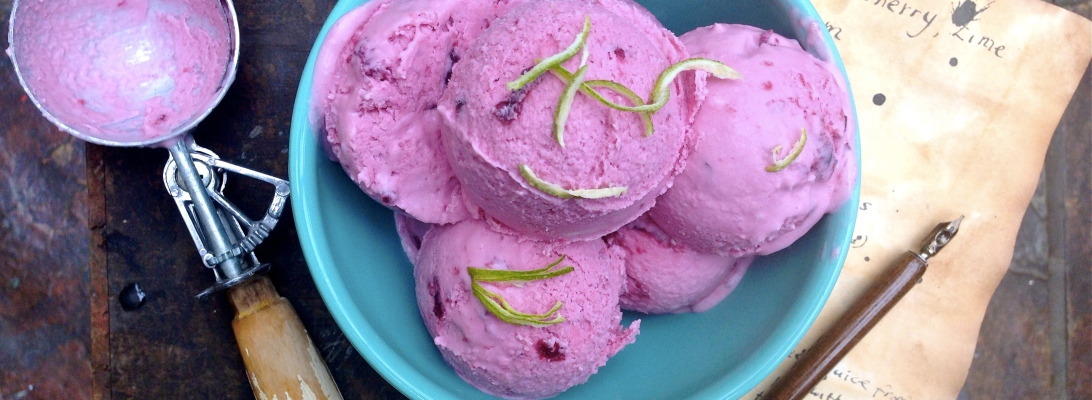
Cherry Coconut Lime Ice Cream


A few weeks ago I was catching up with a couple of friends, when quite naturally the conversation turned to food and some of the interesting food combinations we have had on our travels and experiments with chocolate in our baking. In that moment, Catherine interrupted my train of thought as she more or less re-enacted the first time she tried Cherry and Coconut Ice Cream in Barbados.

“It has to have the little bits of coconut in it” she explained, leaving the rest of us salivating at the thought. I immediately began to picture the combination, but the thought of grating a whole coconut on a lazy Sunday morning, just wasn’t my idea of fun. The conversation moved on, but the challenge never left me.

I knew I wanted to make an egg-less ice cream, one that also didn’t require an ice cream machine nor took all day to set. It also needed to be relatively inexpensive, so substituting fresh ingredients for frozen or tinned was the way around that.

The end result…how do I begin to describe this: This is the best tasting ice cream I have had in a long time. I almost finished it. The whole process is so lickably beautiful, it’s hard to describe! literally you could have ice cream the same day ready to serve with your evening meal. I love it and I know you will too!

This recipe is dedicated to Catherine and Corinne, my inspiration and voluntary taste testers - Thank you so much ladies! xx


Cherry Coconut Lime Ice Cream

  • Servings: 8 - 10 Scoops
  • Difficulty: easy
  • Print

Ingredients

Juice of 1 lime

140g caster sugar

125g frozen sweet black cherries

200ml tin coconut milk

300ml double cream


Method

In a small pot, squeeze the juice from the lime with the sugar and heat gently, stirring to dissolve the sugar. Add the frozen cherries and simmer for 2 minutes, you can begin to mash-up the cherries a little at this point.

IMG_7651Pour the cherry mixture into a plastic or stainless steel bowl and stir in the coconut cream. Leave to cool.

In a separate bowl, whip the double cream in a large bowl until it holds its shape, then gradually stir in the cherry mixture.

Put the bowl in the freezer for about 1 hour, until the mixture is set about 3cm in from the edges.

Remove from the freezer and whip up the mixture using a whisk or fork.

When it’s fairly smooth, return to the bowl to the freezer for another hour, then repeat the whisking one more time.

Transfer the ice cream to a plastic container, cover and freeze until firm.

Before serving, transfer the ice cream to the fridge for 30 minutes to soften it. Garnish with grated lime rind before serving.


Supermalt Banana Fritters

This is an original creation of mine which I am so excited to share with you! Don’t let the deep-frying put you off, this is an occasional irresistible, seriously addictive dessert which is best served hot and crispy with vanilla ice cream. I can’t say I am a huge fan of Supermalt, but I do get a thirst for it with certain meals. Fans of Supermalt, when you make this dish, tell me if you can taste the drink in the batter? Not being a malt novice, in my mind Supermalt gives the batter its colour and the crispy light texture. It also makes an incredible caramel sauce which detailed below. One thing to remember, make sure the bananas you use are not overly ripe, the firmer the better with no dark spots - they need to take some intense heat while frying!

Supermalt Banana Fritters

  • Servings: 12
  • Difficulty: easy
  • Print

175g/6oz plain flour
1 cup / 250ml Supermalt
125g/41/2oz cornflour

1 tsp baking powder
1/4 tsp cinnamon

Vegetable oil to fry
4 Bananas, peeled cut into thirds

The Sauce

30 ml Supermalt
50g light muscovado sugar (light brown)
40g  butter
30ml  cream
¼ tsp vanilla

Whisk the flour, Supermalt and salt together in a large bowl until smooth. Place in the fridge for 1 hour. Whisk the flour and cinnamon together in a shallow bowl. Remove the batter from the fridge and give it another good whisk. Slice the bananas into thirds.

Pour the vegetable oil into a large high sided pot. Don’t fill a pot full of oil.

Heat the vegetable oil until very hot, at least 350F if you have a thermometer. NOTE: if the oil isn’t hot enough the fritters will sink to the bottom and immediately stick to the bottom of the pan. Then, they will take too long to cook resulting in the banana turning to mush. When the oil is hot enough roll the bananas into the cinnamon flour then into the batter and then into the oil. The fritters will drop in and then almost immediately rise to the surface. I recommend using one fritter as an oil test first before cooking the rest.

Let them cook until golden brown then remove with a slotted spoon and drain in a paper towel lined bowl.

Mix all but the  cream in a small saucepan and bring to the boil, stirring all the while. Reduce heat to low and simmer for 5 minutes without stirring. Remove from the heat and stir in the cream. Transfer to a bowl and leave to cool and thicken.

Copyright © Ranette Prime and Love Loretta’s Kitchen, 2014. All Rights Reserved.

White Chocolate & Lemon Viennese Whirls

Viennese Whirls growing up and pretty much as they are today, are made with a combination of jam and cream. What separates them from your average jammy dodger is the light crumbly shortcake texture of the biscuit. For this recipe you don’t have to keep to the classic ‘mountain peak’ or Swirl shape, why not experiment with shortcake fingers or squares?

The real reason why you should go to the trouble of squeezing the dough through a piping bag is because it’s aesthetically pleasing and makes you look like a pro. So why not give it a try?

White Chocolate and Lemon Viennese Whirls

  • Servings: Makes 32 sandwiches
  • Difficulty: medium
  • Print

Biscuit

250g/9oz very soft unsalted butter

50g/2oz icing sugar, plus extra to decorate

250g/9oz plain flour

50g/2oz corn flour

½ tsp pure vanilla extract

Filling

1/4 cup double cream

150g white chocolate chopped coarsely

1/4 cup (or more) lemon juice

1 tsp grated lemon rind

Yellow food colouring (optional)

For the Biscuit

Preheat the oven to 190C/375F/Gas 5. Line a baking sheet with greaseproof paper.

Put the butter, icing sugar, plain flour, corn flour and vanilla extract in a food processor and blend until smooth. You may need to scrape the mixture down a couple of times with a rubber spatula.

Spoon the dough into a piping bag fitted with a large star nozzle. Pipe 16-18 in rosettes or swirls of the dough, spacing well apart.

Bake in the centre of the oven for 13-15 minutes or until pale golden-brown and firm. Cool on the baking tray for five minutes then transfer to a cooling rack. Repeat with the remaining dough to make 32-36 biscuits.

For the filling

Bring cream to the boil in a small saucepan.

Remove from heat. Add chocolate and stir until completely smooth

Add food colouring and lemon juice to taste (you want to be able to taste the lemon, don’t let the chocolate be overpowering).

Refrigerate until spreadable (roughly 1 hour +)

With another piping bag swirl on the cream to one of the biscuits, sandwich the other biscuit together gently and dust with the icing sugar to finish.