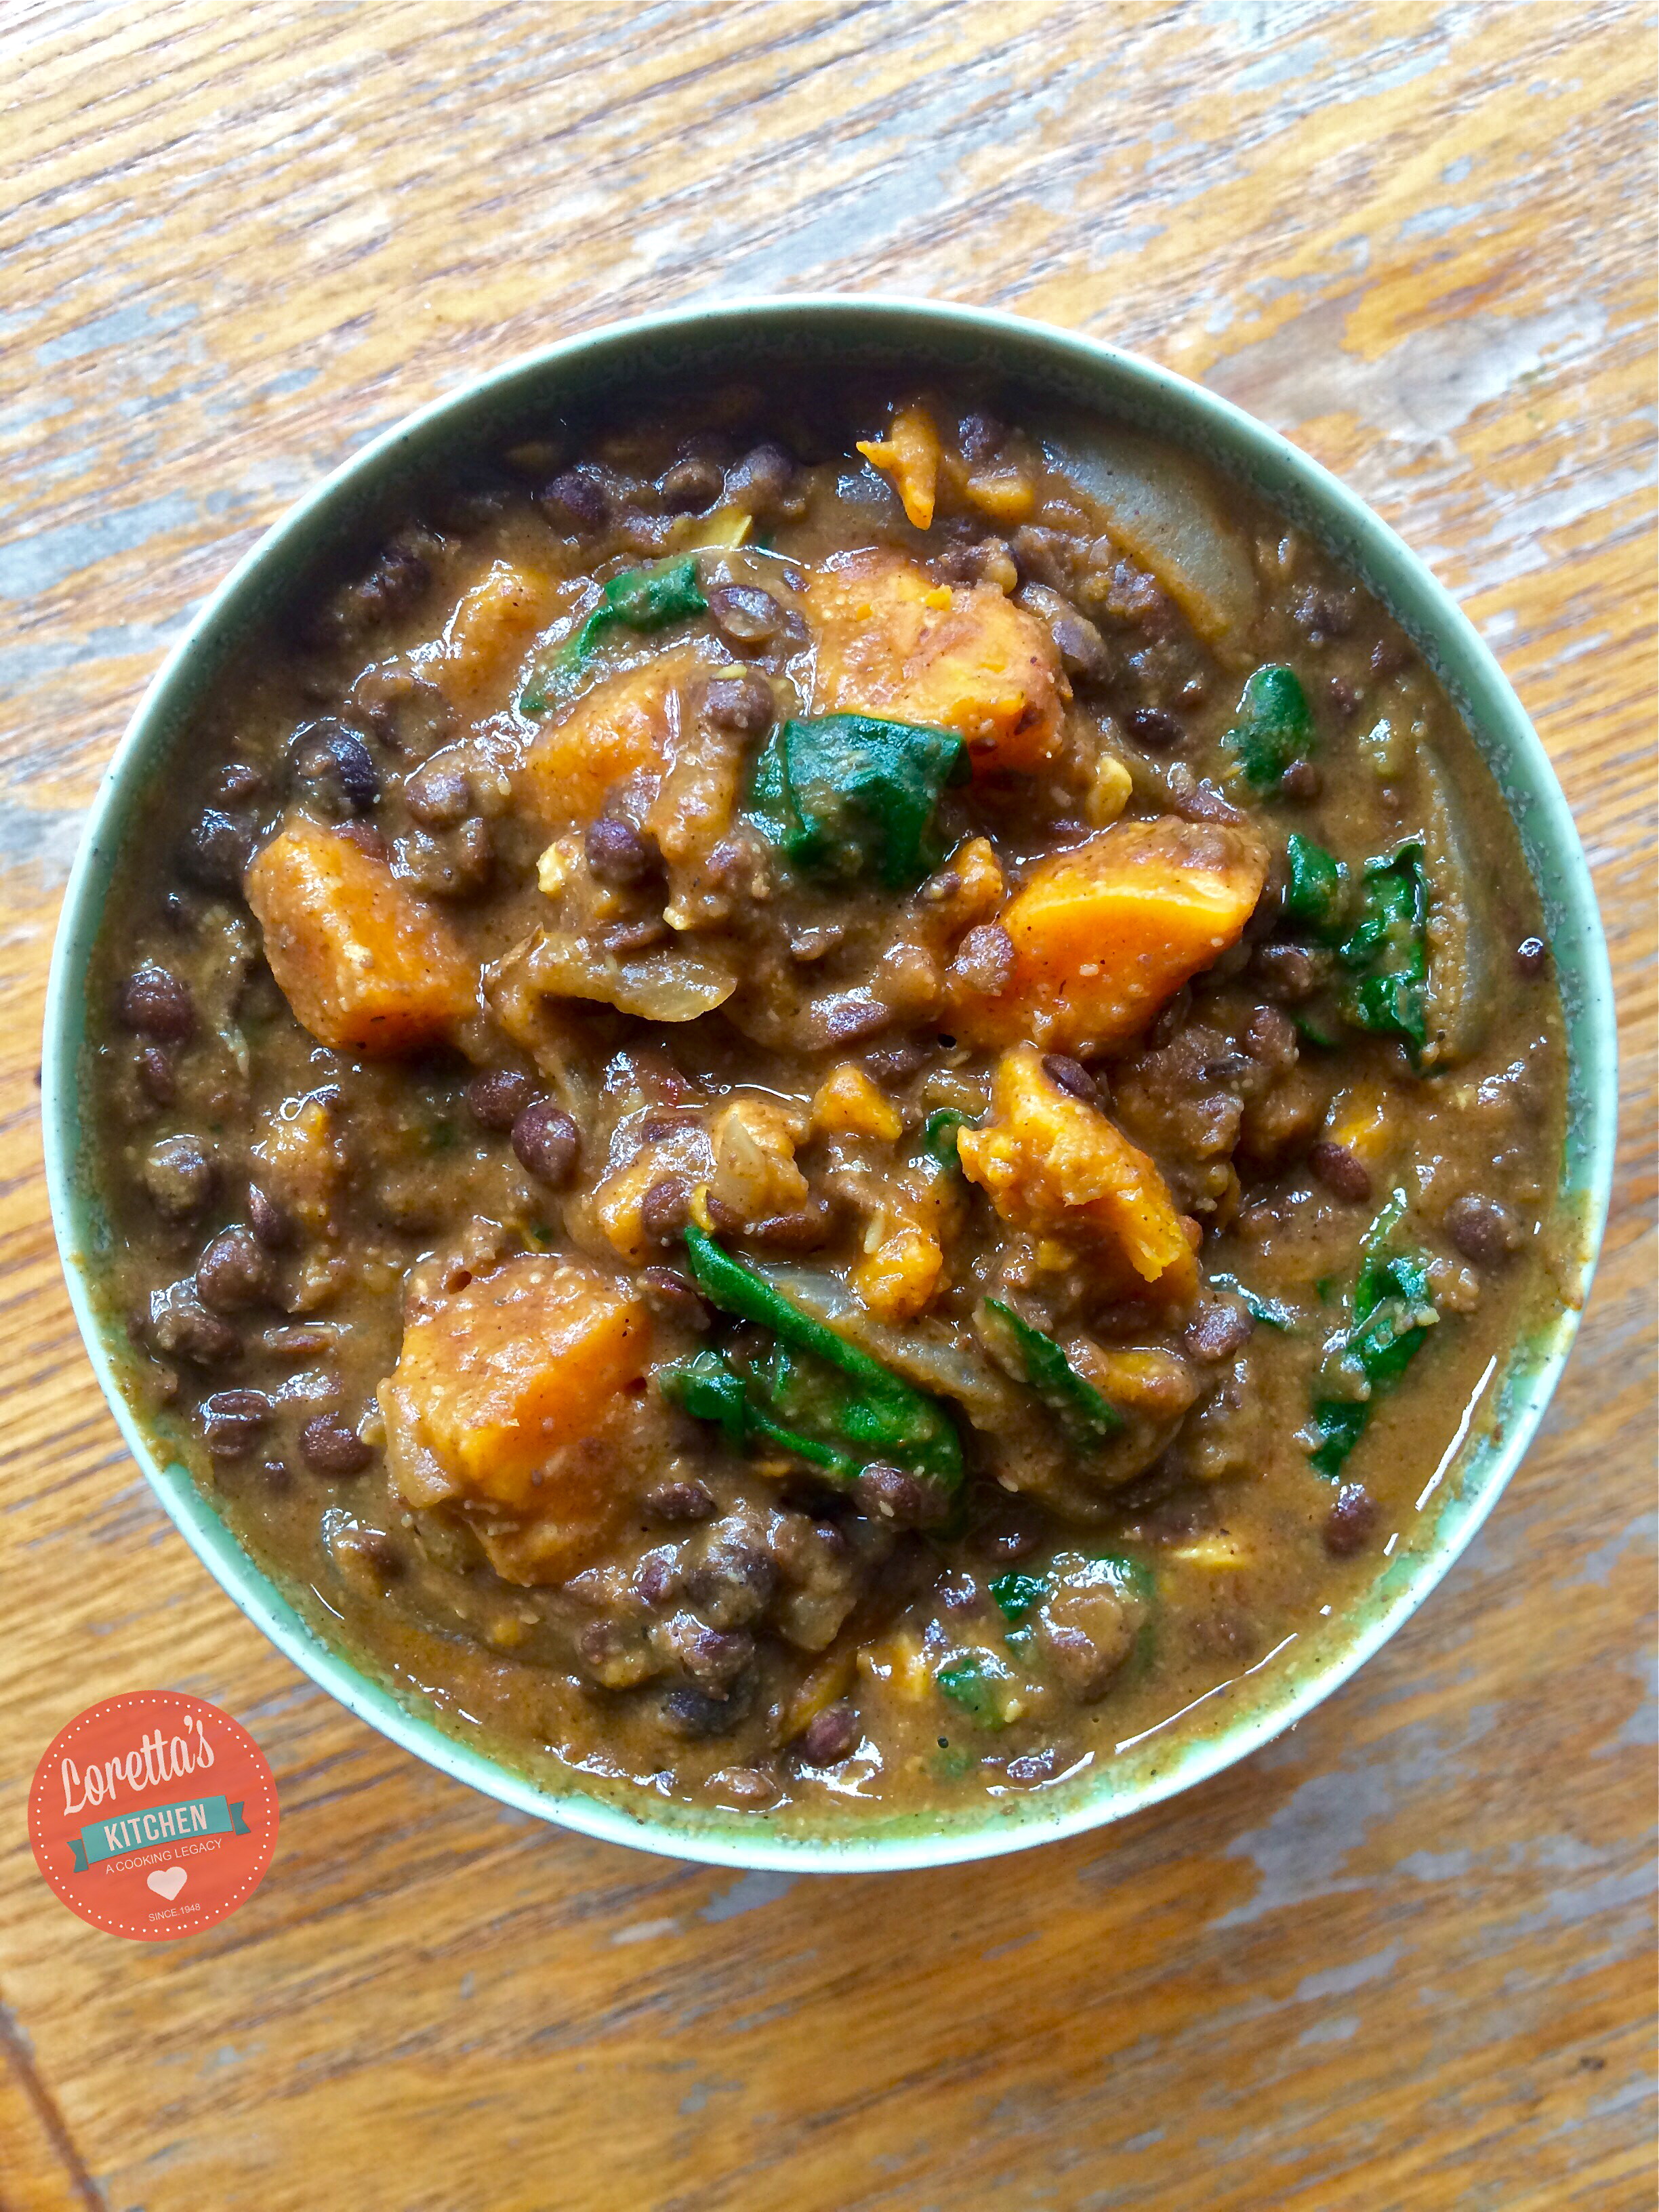
Ethiopian Lentil Stew (Misir Wot)

If you can’t stand the heat, then you better stay out the Ethiopian Kitchen!

It’s not that Ethiopian food doesn’t have a range of mild flavoured dishes, they do, but pepper is so essential to the cuisine that to avoid it is to essentially ban yourself from the whole experience!

Ethiopian Cuisine: I haven’t tasted anything so lip-smackingly delicious in a good long time! I’m gonna be stuck on this for a while!

Ok admittedly the last time I tasted authentic Ethiopian cuisine was about a year ago where I just happened to walk by a small take away 5 minutes walk down Kingsland High Street in Dalston, London. They offer a selection of stews or ‘wots’ with a combination or rice or the infamous Injera bread, all for just £4!!

FullSizeRender (13)
Kingland High Street, Dalston, London

Many Ethiopian’s are Orthodox Christians who traditionally eat vegan on Wednesdays and Fridays, as well as other special days,  hence why there is such a wide selection of vegan/vegetarian Ethiopian dishes.

This recipe is adapted from the more classic Misir Wot, which literally means ‘lentil stew’; I have added sweet potato, coconut milk and spinach to this mix.

This is also my first time using my new found Ethiopian spice blend home made brebere which I made virtually a few minutes before assembling this dish. I didn’t taste the stew till the very end, and when I did, let me tell you I almost burnt my mouth going for a second helping, I was surprised! With such a wide range of spices all packed in one blend, I was expecting a bitter, confused taste, instead - pure harmony, I could taste everything, not overpowering at all. So step away scotch bonnet! There’s a new kid in town!

More Ethiopian dishes to come!


Ethiopian Lentil Stew (Misir Wot) 


INGREDIENTS

2 medium sized sweet potatoes - cut into chunks

1/2 white onion, sliced

2 large garlic cloves - crushed

1 tsp finger chopped fresh ginger

1 tbsp coconut oil - frying

1 1/4 cup green lentils - pre-cooked

1 tbsp Tomato Paste or 2 plum tomatoes (crushed) with a little juice

2 1/2 tsp of Homemade Berbere Spice

1 cup Coconut Milk

2 cups of boiling water

1 chicken or vegetable stock jelly

3-4 Pimento Seeds

1 generous handful of spinach


METHOD

  1. In a bowl dissolve the stock jelly in the 2 cups of hot water with the pimento seeds. Set aside.
  2. Soften the onions slowly in a deep pot with the coconut oil for 5-6 minutes
  3. Add the garlic and ginger - 2 minutes
  4. Stir in the berbere spice, take it off the fire to allow it to slowly cook
  5. Return the pot to the fire and add the tomatoes, allow it to reduce for 2 minutes, until the water has evaporated.
  6. Add the sweet potato and stir
  7. Add the lentils, stir (medium heat)
  8. Add the stock liquid, pimento seeds and coconut milk. Cover and allow to simmer for 10-5 minutes or until the sweet potato is tender
  9. Stir the spinach in at the end. Season to taste.
  10. Serve with rice


Advertisement

Berbere Spice: a blend of Ethiopia

Berbere, which means “hot” in Amharic, is an Ethiopian spice blend very common to Ethiopian cooking. Most of the heat comes from the fiery long red finger of dried chillies buried under heaps of other amazing spices.

Berbere is treated very much like an ‘all purpose’ seasoning, so it can be added to stews, vegetables, meat, fish and probably even rice as well.

As I carried out my research to find the most authentic blend, I soon realised, whichever combination I found, it would pretty much empty out my whole kitchen cupboard! I think I turned over every jar, bottle and cup that had spices in them. It actually felt good to use them again, some like fenugreek had barely been touched; and I was getting tired of the same old 1-2-3 combinations I’ve been falling back on for yonks (haven’t used that word in ages?!).

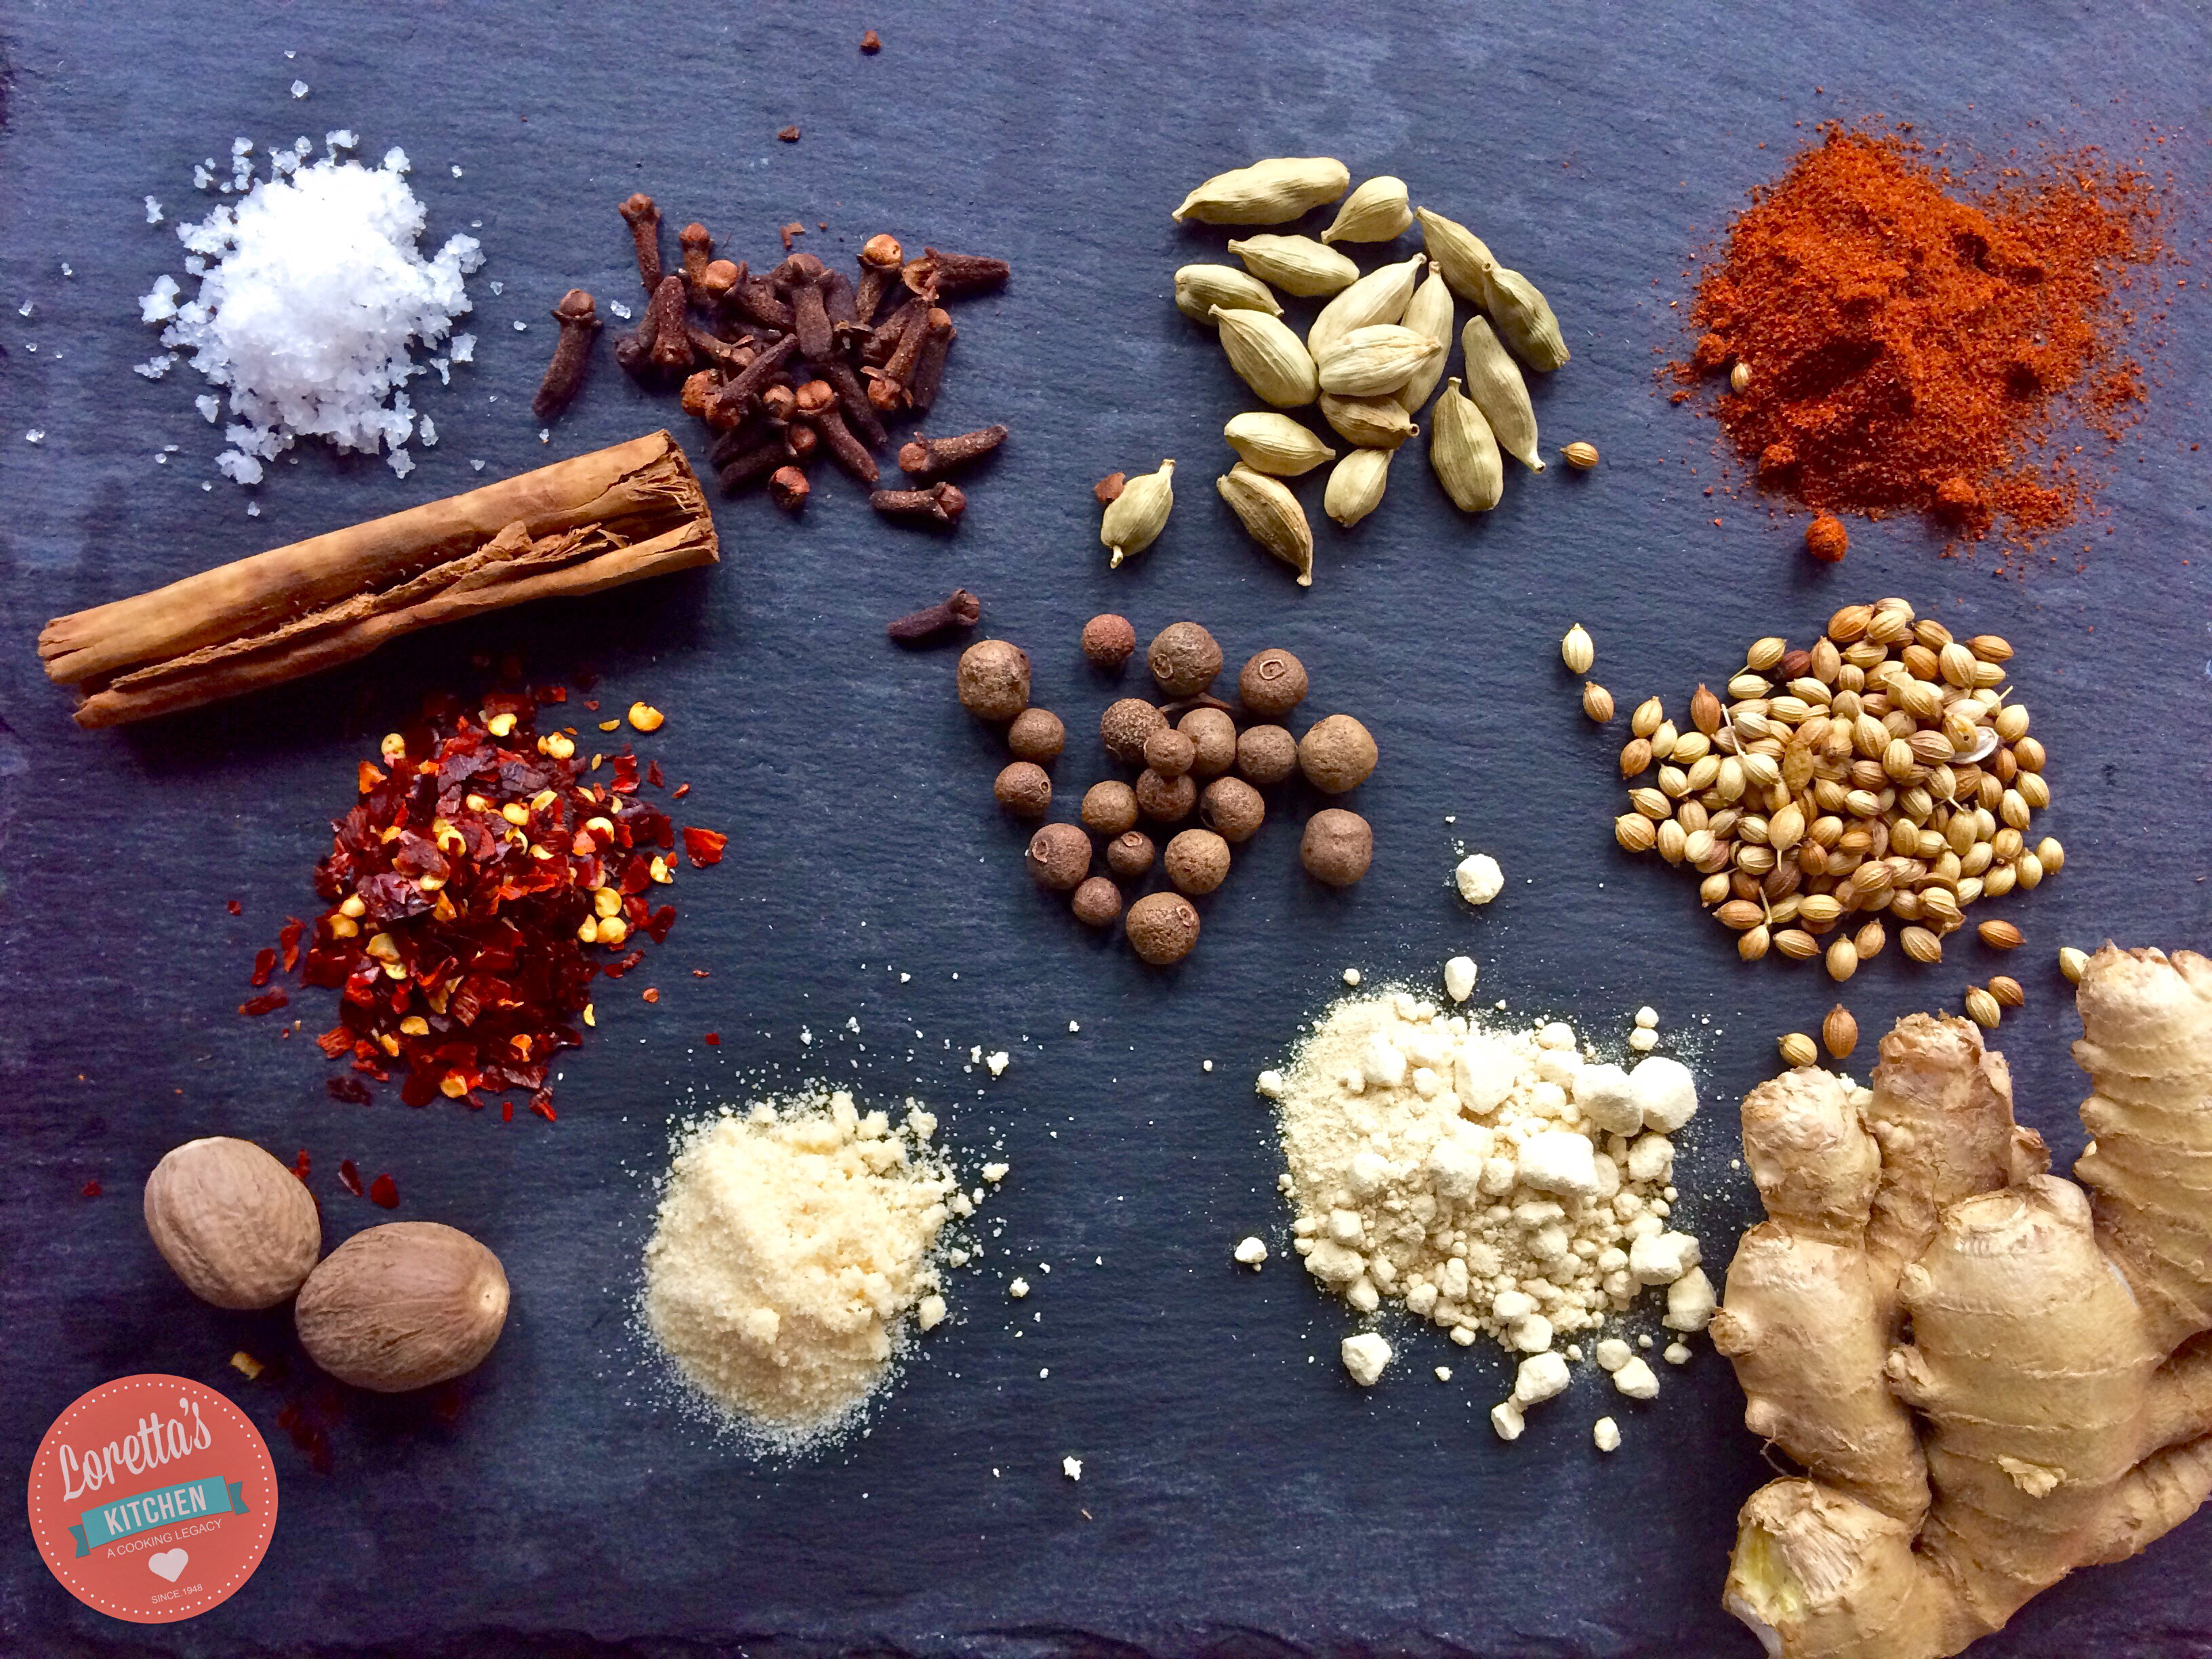
Doesn’t it look amazing! And it tastes absolutely delicious! You’ve basically cut your seasoning time down to less than a minute!

Ok let’s take a closer look:

  • Salt
  • Cinnamon
  • Cloves
  • Cardamom
  • Smoked Paprika
  • Coriander Seeds
  • Ginger
  • Fenugreek Powder
  • Pimento Seeds
  • Onion Salt
  • Nutmeg
  • Chilli Flakes

Other recipes include garlic powder and black pepper.

Preparation

This really depends on you. I wanted something I could store in a jar and use whenever to spice up a dish. So I resorted to using powders with the following exceptions: fresh garlic, ginger, onion. Only because I’m use to adding these ingredients to a dish anyway.

So here are the measurements for a jar of berbere spice, most dishes only require 2 1/2 teaspoons of it:

  • 2 teaspoons Fenugreek powder
  • 2 teaspoon Black pepper
  • 2 teaspoon Cloves
  • 3 teaspoons of red chilli flakes
  • 2 teaspoons ground coriander
  • 1 teaspoon ground allspice
  • 2 teaspoons ground cardamom
  • 1 tablespoon onion powder
  • 3 Tablespoons smoked paprika
  • 1 Tablespoon garlic salt
  • 2 teaspoon ground nutmeg
  • 2 teaspoon ground ginger
  • 2 teaspoon ground cinnamon


METHOD
Combine all the ingredients into a mortar and pestle and grind together until thoroughly mixed. If you can’t get your hands on any ground cardamom, then I’m sorry (as I did), you’ll have to grind it by hand. I find adding a pinch of rock salt to the mix helps to grind the seeds faster!

IMG_3834
When you are ready to use the berbere spice, treat it like you would a curry powder: you have to dry roast / fry it on a low heat first to release the flavours before pouring on your liquid. Be careful not to burn the spice as all you’ll have is a gritty mess. I have a recipe coming up using this very spice…so peep back later!

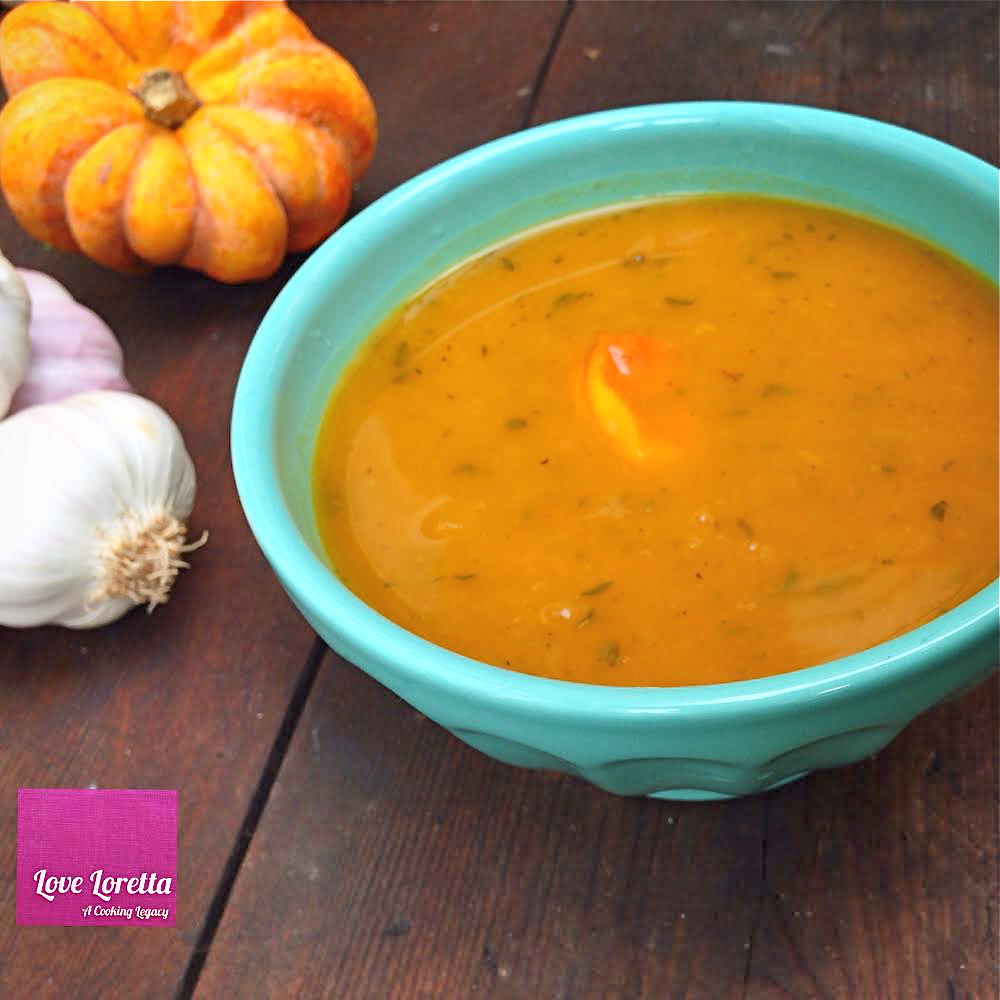
Roasted Pumpkin & Garlic Soup

So this is how you make effortless, tasty and satisfying soup in minutes. Soup doesn’t have to be complicated nor does it need a whole bunch of ingredients to leave your mouth watering for more. I grew up using yellow or red split peas as a base for thick soups. But as the split peas release no flavour of their own, I found myself adding tons of ingredients, and root vegetables which meant more time in the kitchen and less time doing the other things I enjoyed doing.

This soup however is complete in 3 easy steps: roast, blend, boil.

And if you have any left over, it could work as a good based for a pasta dish or stew. The dense sweet nutty flavour of this variety of pumpkin (normally sold in caribbean markets) when roasted needs very little to enhance its flavour more. You can add more or less water to achieve the consistency you want. I think you’re going to really like this one…;-)

Roasted Pumpkin and Garlic Soup

Ingredients:

600g Raw Pumpkin (leave skin on)

Half White Onion

Half Garlic Head (sliced down centre)

Drizzle of Olive Oil

4-5 Sprigs Fresh Thyme

1 Scotch Bonnet

1/2 vegetable stock cube

1 tsp garlic/ ginger paste

Salt/ pepper to taste

1 1/2 cups water

Method:

Pre-heat oven to Gas Mark 8

Place Pumpkin, onion and garlic into a roasting tin and drizzle with oil, salt and pepper. Remove any excess skin from the onion and garlic to reduce burning.

Place in oven for 23-30 minutes or until the pumpkin is tender

Remove the tin from the oven and allow to cool for 15 minutes before scooping the pumpkin flesh, squeezing the garlic bulbs out of its shell and removing the outer skin from the now caramelised onion.

Transfer to a large pot with the remaining ingredients on the list. Boil for 5-6 minutes gently breaking up the vegetables.

Then allow it to cool for 10 minutes before transferring all the ingredients (except the thyme and pepper) into a blender until smooth. Return the soup to the pot and continue boiling for 5 minutes, season to taste and serve!

Quick Golden Multi-seed Bread

There is nothing more appealing than the smell and look of fresh bread from straight out the oven. It sends you drooling, scrambling for the bread knife or the first opportunity to rip a piece out of its side to smother it with cool butter, jam or chocolate spread. In this case chocolate spread won: it was a delicious combination of Nutella with the crunchy seeds and malty taste of the fluffy bread that made my midday brunch most satisfying.

And to think that only a couple of hours earlier this loaf of bread was merely a packet of bread mix, olive oil and a bit of water away from becoming delicious! This is probably the most surprisingly tasty bread mixes I have made: the dough turned into deep caramel the moment I started to add water to the mix. I was also tempted at some stage to add honey to the mix, in fear the bread would be bland, but it wasn’t necessary. The bread was fluffy and had a slight sweetness to it.

The following day the bread was a little firmer, probably because I put it in the fridge wrapped in cling film. This actually made it good for toasting. Every once in a while it’s nice to treat yourself to some home made bread, the downside is you feel obliged to eat it all yourself so I would recommend making rolls so that you can share it among your friends and family.

Golden Multi-Seed Bread

Ingredients:

1 packet of Sainsbury’s Golden Multi-seed Bread Mix

15 ml Olive Oil or 25g butter

320 ml luke warm water

Method:

(to bake by hand0

1. Rub the bread mix with the butter or oil in a bowl with your fingertips until the mixture resembles fine breadcrumbs. Gradually add the water to form a soft dough.

2. Knead well on a floured surface for 10 minutes until smooth and elastic, then place it back in the bowl, cover with lightly oiled cling film. Leave the dough in a warm place for one hour to rise and double in size.

3. Knead well again on a floured surface for a few minutes, place in a greased 2lb loaf tin. Or shape the dough into 8 equal sized balls and placed in a round tin (as pictured above).

Cover with lightly oiled cling film. Leave the dough in a warm place for half an hour to rise again and increase in size. Preheated oven 230oC/450oF/Gas mark 8

4. Remove cling film and bake in the top of the ovenfor 30 minutes or until golden brown. Then brush with melted butter to give the warm bread a glossy shine and buttery taste.

Spiced Walnut Butter


If your anything like me, walnuts haven’t rated too highly on my ‘nut list’ either. But did you know that walnuts have the highest amount of omega 3- fatty acid of any nut? In other words it’s the all round hair, skin and nail food. Now does it sound a bit more appealing? Ok well I tried.

I still believe the walnut has the right to be released from the prison of banana breads and festive nut trail mixes; it has a hugely bold even bitter flavour, I agree, but when combined with sweet cinnamon and nutmeg, it seems to mellow down to a smooth pecan like taste. I say make the most of that trail mix and create the most irresistible butter you would have ever tasted. I’ve been enjoying it all week and feeling good!

This recipe can keep for up to 2 weeks if stored in an air tight glass jar in the fridge. This recipe makes just over a cup of walnut butter. Enjoy!


Spiced Walnut Butter

Ingredients

3 cups of raw walnuts
pinch of salt
40 mls Maple Syrup
1 tsp vanilla extract
1/4 tsp ginger powder
1/2 tsp cinnamon
1/2 tsp grated nutmeg
2-3 tsp liquid coconut oil

Method

Pre-heat the oven to Gas Mark 4 (350F). Place the walnuts on a baking tray and toast in the oven for 5-7 minutes. Watch them carefully as you don’t want them to go brown. Set aside to cool.

In a food processor, place the other ingredients and add the walnuts. Blend on a high speed until you have the consistency you want: crunchy or smooth butter. Taste the mixture and add more syrup or spice if desired.

Serve with warm toast or bagels.

Nutritional value of Spiced Walnut Butter.

Spiced Walnut Butter(2 tbsp)
Calories(Calories from fat) 258
Sodium 2 g
Total Fat 19 g
Potassium 42.8 mg
Saturated Fat 2 g
Total Carbs 17.4 g
Polyunsaturated 2 g
Dietary Fibre 3.2 g
Monounsaturated 3 g
Sugars 11.9 g
Protein 5 g
Zinc 5.5%
Calcium 4.8%
Manganese 33%
Iron 5% 9.3%

*Percent Daily Values are based on a 2000 calorie diet. Your daily values may be higher or lower depending on your calorie needs.

Sedano al Pomodoro


This has to be the first time I have given celery centre stage in a dish. Most of the time it remains well hidden in a stir-fry, rice or soup; the only indication of its presence being its strong aniseed flavour or the random in-digestible stalk that gets caught between your teeth. But with its firm crunchy texture and fine grooves along its spine, celery ought to be used a lot more like pasta as it can carry a lot of sauce on its back without wilting under the weight.

So here I have created this recipe: ‘Celery in Tomato Sauce’ basically, for the ‘Beat the Bloat’ series I’m running at the moment. All of this week I have been consuming only those recipes that I have mentioned in the series, and along with daily exercise I have to say, I feel amazing! Very refreshed and not ‘full’ to the point of wanting to sleep midday (if there’s any cause for sleep, its this beautiful hot sun we’ve been enjoying lately).

So enjoy this side dish with rice or maybe even spaghetti - the choice is yours!


Sedano al Pomodoro

Ingredients:

8 Celery Sticks - sliced

1 large Tomato - finely chopped

1 tbsp Tomato Paste

2 garlic cloves crushed

1/4 white onion, finely chopped

3 sprigs of fresh Thyme (or 1 tsp dried thyme)

tbsp vegetable oil

3 Anchovy fillets (optional)

pinch of black pepper

Method:

1. Slice the celery and steam in a pot for 2 minutes or until the stalks turn bright green in colour. Then transfer the celery to an ‘ice cold bath’ of water to stop them cooking and to retain their colour.


2. In a frying pan, fry the onion and garlic then add the anchovies and stir them in until they melt. Then add the tomato paste and fresh tomatoes.

3. Stir in the fresh thyme and then gradually add the celery stalks (drained from the water) to the saucepan, stir them in until fully drenched in the sauce. Then add salt and pepper to taste.

7 Recipes to Beat Bloating


I know I’m not the only one who has experienced the ‘bloated feeling’, when your tummy is stretched, puffy, uncomfortable and feels like a permanent rubber dingy round your waist. It often follows a big weekend of eating badly or late into the evening or some other festive occasion.

But for some people, bloating is more than an occasional inconvenience. If your stomach or tummy often feels bloated, it could be due to several things besides excessive wind and constipation.

Funny, I was always told as a child to chew my food properly and to drink peppermint tea and water, I wish I knew then what I know now that these are some of the aids to reducing bloating.

Medical advice is always advised if this appears to be your experience over a sustained period of time, but for many other people, there are moderate changes and intelligent ways we can incorporate ‘Bloat Beating’ foods into our diets and hopefully avoid the need for medical intervention.

This week I will be sharing with you 7 recipes that combine some of the many foods that help reduce bloating. Feel free to share your reviews and tips as I would gladly welcome them!


Breakfast:

  • Lemon Aid

Warm lemon or lime water is not only a good defence against the common cold, it also serves as the perfect ‘good morning drink’, to flush out toxins and kick start your digestive system. Lemon water also prevents constipation and diarrhea, by ensuring smooth bowel functions.

Lemon is also a rich source of vitamin C, which enhances your beauty by rejuvenating skin from within bringing a glow to your face, and helping to prevent the formation of wrinkles and acne.

One of the major health benefits of drinking lemon water is that it paves the way for losing weight faster, thus acting as a great weight loss remedy. So before anything else enters your system, have a tall glass of lemon/lime water every day.


  • Watermelon  and Bananas

All kinds of melons are beneficial to your health, but watermelon is known as one of the juiciest fruits on the stand. That’s probably because it consists of 92 percent water. It is also reported to have a natural diuretic property and is a great source of potassium.

Too high an intake of salt is one of the most common causes of water retention around the abdominal area. Foods rich in potassium, such as bananas, help combat bloating caused by salty food. When incorporating bananas into your anti-bloating diet, be sure to only eat ripe fruit — unripe bananas contain resistant starch which can cause wind and bloating.

Try the Watermelon ‘Brain Freeze’ Smoothie on the blog for a potassium rich start to the day!


  • Greek Yoghurt & Honey

Cultured natural yoghurt typically contains Lactobacillus acidophilus and/or Bifidobacterium bifidum (or ‘friendly bacteria’ as it’s otherwise known ). This probiotic bacteria lives in the gastrointestinal tract where they help digestion and fight the overgrowth of harmful bacteria, thereby preventing bloating. You can actually purchase Probiotic Acidophilus in a tablet form from good health shops or online; but a tasty package to enjoy this is Greek Yoghurt with Honey.


  • Bran Cereal and Oatmeal
Fiber helps relieve constipation, which is an all-too frequent cause of bloating. By adding bulk in the form of certain cold or hot cereals, everything moves through the intestines more quickly.  Just be certain to not add too much fiber to your diet too fast, or worsened bloating can occur.
  • Strawberries and Blueberries

Fiber also takes the form of certain delicious fruits and berries. Snacking on high-fiber foods such as strawberries and blueberries, can help clean out one’s system regularly.

Why not try the Peanut Flax Granola recipe on the blog with some of the Greek Yoghurt and berries for a perfect bloat busting breakfast! 


Lunch:

  •  Brown Rice

Some foods, especially certain carbohydrates, are either indigestible or only partially digested in the gut. These foods can cause gas buildup and therefore bloating. Rice however, particularly brown rice makes a good substitute for starches such potatoes. Rice is fully digested in the small intestines, giving it the least potential to form gases in the gut.

  • Turmeric Powder

You’re probably familiar with turmeric as the main spice in curry. It has a warm, bitter taste and is frequently used to flavor or color curry powders. But the root of turmeric is also used widely to make medicine. Turmeric is used for many ailments including to treat, intestinal gas, stomach bloating, heartburn and liver problems.

This week on the blog: A quick Pilau Rice recipe which combines these ingredients for an easy tasty way to a flatter stomach!

  • Rosemary and Garlic

Rosemary has been used to treat everything from heartburn and headaches to toothaches and high blood pressure. But it also treats intestinal gas and helps digestion. Garlic helps reduce the levels of fat in the liver, whose main functions include detoxification and the production of biochemicals necessary for digestion — major aspects of the prevention of bloating.

Try the garlic and rosemary infused sweet potato chips, the crispiest chips every time!


Dinner:

Celery:

Over the years this green crunchy stalk has been used as a digestive aid to regulate bowel movements and to control intestinal gas because its chemicals are known to decrease fluid retention. Because of its high water content with a detoxing system, this helps purge your body of toxins.

Check out this tasty celery recipe on the blog this week!

Beans and Lentils:

Most of us grew up believing beans was the source of all bloating and flatulence, but don’t be too harsh on the little gems, their high amount of fiber, are a good choice for aiding with digestion. The potassium-rich foods are also naturally high in both estrogen and protein and can relieve period-induced bloat.

Kale and Spinach
These green leaves, in addition to lettuce and chard, require ample chewing and provide a healthy dose of fiber, vitamins, and minerals. They also help with acid indigestion, constipation, and urinary tract infections.

Another healthy recipe combining these ingredients will be coming your way this week…


Delicious Peanut Flax Granola

Rome was not built in a day, neither was Granola, or so it seemed. The secret to good granola is to cook it slow and low!

I learn from my mistakes very quickly! The first time I made this, I put the oven on so high, the granola cooked to a crisp; rather than throw all my hard work away, I grimaced and ate the bitter cereal the rest of the week. Never again.

Top tip: after 20 minutes in the oven, take it out and turn the mixture, making sure to push the granola from the edges inward toward the middle. Then place it back in the oven for another 10 minutes. Remove and stir it one final time before returning it to the oven for the last 10 minutes: a total of 40 minutes!

Long wait but the reward is so great; your breakfasts (or even snacks) will leave you feeling so satisfied. You can thank me later…enjoy!

Peanut Flax Granola

Ingredients

* Pre-heat oven to 275 degrees

3 1/2 – 4 cups Whole rolled porridge oats

1/2 cup pecan nuts - roughly chopped

1/2 cup cashews, roughly chopped

1/4 cup golden flax seeds

2 tbsp almond meal

1/4 cup sunflower seeds

1/2 cup raisins (or your choice of dried fruit)

1/4 cup peanut butter,

1/4 cup vegetable oil

1/4 cup pure maple syrup

2 tbsp brown sugar

1/2 cup water

2 tsps vanilla extract

1 tbsp almond extract

1 tbsp cinnamon powder

Pinch of salt

Method: 

1. Combine all dry ingredients (minus the raisins and brown sugar) in a large mixing bowl

2. Combine all wet ingredients plus the brown sugar in a small sauce pan and stir occasionally until simmering. Simmer for a few minutes until it starts to thicken.

3. Pour hot mixture slowly over oat mixture and stir until the mixture is moist and the liquid is evenly distributed throughout.

4. Spread mixture evenly onto heavy baking tray and place on middle rack in heated oven.

Total baking time is 40 minutes - Remove from the oven and place a clean, heavy pan on top of the granola while it’s cooling.

Now you can break apart, add to a large bowl and add the raisins or any other dried fruit. - Keep in air tight container.

Crispy Sweet Potato Chips…Every time!

I didn’t think it was possible to enjoy crispy sweet potato chips until now. Sweet Potato has a very high water content which is why it can’t naturally achieve the crispy status of a regular chip…without some help from its little friend corn starch.

The key to achieving ultimate crispiness is to eliminate moisture, so make sure you pat the potato sticks dry before adding the corn starch and seasoning and more or less toss them straight into the oven soon after that with only a drizzle of oil.

Crispy Sweet Potato Chips


Method

* Pre-heat oven to 425 F. (Gas Mark 7)

1. Cut sweet potatoes into 1/4 inch sticks leaving the skin on.

2.  Soak your fries in cold water for around 45 minutes to an hour for maximum crispiness! This draws  out the excess starch from the sweet potatoes, helping them to cook all the way through better so they are crispy on the outside, and soft on the inside without burning.

3. Drain the fries and allow them to dry on kitchen towel absorbing all the excess moisture.

4. Mix together cornstarch, rosemary, garlic salt  and salt. Add the fries to the mix and  seal the container and shake!

5. Place fries on baking sheet.

6. Drizzle with olive oil and sprinkle with salt

7. Spread chips out on baking tray. Make sure they are not touching to achieve ultimate crispness.

8.Bake for 15 minutes. Turn over if necessary. Bake for a further 5 minutes.

Recipe inspired by Southern Fatty